Unified Asset Management is the practice of managing all organizational assets, whether physical or digital, through a single system.
The main advantage, and perhaps the most valuable one, is that it eliminates the need for multiple tools to handle different types of assets across the company. Instead, everything is consolidated into one platform that centralizes administration, improves visibility, and ensures every resource is properly managed.
What is Unified Asset Management?
Unified Asset Management is the practice of identifying, tracking, managing, and visualizing every resource within an organization — whether hardware, software, cloud services, or even non-IT assets — through a single system. This is usually achieved with specialized software designed to centralize information and simplify administration.
This approach breaks down silos. Assets are no longer managed in isolation, but seen as part of a connected ecosystem where their relationships and dependencies become clear. As a result, organizations gain a deeper understanding of how resources interact, optimize their use, and make better-informed decisions.
Why do organizations need a unified view of their assets?
Having a unified view of assets gives organizations the ability to see their entire resource environment in one place. This visibility is not only convenient, it also drives efficiency, security, and smarter decision-making across the business.
Unified Asset Management benefits:
- Centralized visibility – Get a single source of truth for all assets instead of fragmented systems.
- Improved efficiency – Save time and reduce errors by managing everything through one platform.
- Better cost control – Track usage, depreciation, and underutilized resources to optimize spending.
- Stronger security and compliance – Monitor software, hardware, and access in real time to reduce risks.
- Smarter decision-making – Understand dependencies and connections between assets to plan strategically.
How to build a Unified Asset Management inventory in InvGate Asset Management

InvGate Asset Management is a no-code Asset Management solution that lets you create a unified inventory of assets in no time. This includes both physical and digital assets, giving you complete visibility and control over your organization’s resources.
Its no-code approach and intuitive interface make InvGate Asset Management easy to implement and use from day one. Plus, thanks to its consistent pricing structure, your organization can seamlessly scale as new assets are added.
InvGate Asset Management for non-IT assets
While it specializes in IT Asset Management, InvGate Asset Management also makes it simple to add physical non-IT assets to your inventory. Whether it’s a fleet of vehicles, valuable office furniture, or peripherals (like keyboards and headsets), the platform offers flexible ways to register and manage them.
- Custom asset types – Create different categories so even your most specific non-IT assets have a place in your inventory. Predefined types are also available to speed up the process.
- Manual asset creation – Add Configuration Items (CIs) manually for full flexibility and control, ideal for handling unique or highly specific assets.
- Bulk upload – Import large volumes of CIs via CSV or XML, a great resource for organizations transitioning from Excel-based Asset Management.
- QR codes for asset tracking – Generate, assign, and print QR codes for Asset Management directly from the platform. Attach them to your non-IT assets (and even your IT assets) and scan them to retrieve details using the mobile app.
- Physical asset tracking – Once registered, track non-IT assets with high flexibility. Assign locations, owners, and contracts, and map relationships through the Configuration Management Database (CMDB) to understand dependencies and their impact across your environment.
InvGate Asset Management for digital assets
InvGate Asset Management makes it simple to build a complete IT inventory by combining different methods of data collection into a single, unified system. From workstations to cloud environments, you can integrate and monitor all your IT assets in one place.
- Agent-based collection – Quickly deploy agents on Windows, macOS, Linux, and Android devices to start reporting within minutes. Supports multiple installation methods like GPO, WMI, PsExec, or SSH.
- Network discovery – With network discovery, your team can use a proxy server to automatically detect and import connected devices across your network. Configure discovery schedules, IP ranges, and protocols for full control.
- Cloud integrations – Connect directly with providers like Azure and AWS to bring in virtual machines and cloud resources, ensuring your hybrid environment is fully visible.
- Mobile Device Management (MDM) – Integrate with JAMF and other Management Device Management tools to manage iOS devices alongside your existing infrastructure.
- Real-time queries and reporting – Run advanced searches to check configurations (e.g., which machines have firewalls disabled), monitor compliance, and act on potential risks.
- Activity and documentation – Add tags, attach useful documentation, and track asset history through the activity tab for complete Asset Lifecycle Management.
Unified Asset Management features for all assets
Once your IT and non-IT assets are in the system, InvGate Asset Management lets you go beyond inventory. These features apply across all asset types and help you turn raw data into actionable insights:
- Custom alerts – Set up notifications for specific events or conditions affecting your assets.
- Health rules – Define what a "healthy asset" looks like and create pre-defined conditions to flag those that don’t comply.
- Smart tags – Create tags to better organize your assets and set rules for automatic tagging once conditions are met.
- Contract Management – Link assets with warranties, vendor details, and financial information for improved governance.
- Financial tracking – Configure the financial tab to monitor asset depreciation over time.
- Automated reporting – Schedule and export reports with the KPIs that matter most to your organization.
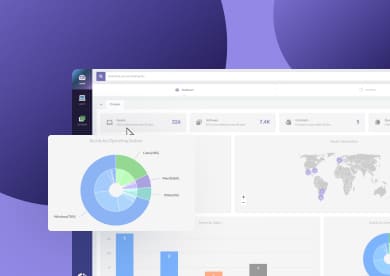
- Dashboards – Gain a quick visual overview of asset metrics and drill down into details when needed.


