


Let’s face it — tracking IT assets doesn’t end with procurement and inventory. One of the most common (and critical) challenges happens during employee onboarding. A laptop leaves the IT depot, travels through HR or Facilities, and eventually lands in the hands of a new hire. But how do you make sure that handover is properly documented?
More importantly, how do you track new employee equipment in a way that’s secure, auditable, and doesn’t rely on physical paperwork?
In this article, we’ll show you how to create a digital trail for asset deliveries during onboarding — from generating a handover document to storing the signed version — using InvGate Asset Management. And the best part? Everything is recorded in the asset’s activity history, making audits and follow-ups a breeze.
Let’s dive in!
What is employee equipment onboarding?
Employee equipment onboarding is the process of preparing, assigning, and delivering IT assets — like laptops, phones, or accessories — to a new hire as part of their first-day setup. It ensures that employees have the tools they need from day one, and that each asset is properly documented, tracked, and linked to its new user.
How to track new employee equipment from the start
Once you’ve procured a laptop, phone, or any other IT device, and logged it into your inventory, the job’s not done yet. That asset still needs to reach the right person and that’s where things often get messy.
New employee equipment is typically handed over by IT, HR, or Facilities, depending on the company’s structure. But in many cases, this part of the process still relies on verbal confirmations or printed documents that get filed away (or worse, lost). That’s a problem when you need to audit who has what, when it was delivered, or whether the employee ever signed off on it.
The good news? With InvGate Asset Management, you can digitize this entire flow — keeping everything in one place, complete with activity history, attachments, and a crystal-clear audit trail.
Here’s how it works, step by step.
Step 1 – Prepare the asset for delivery
Handling IT Procurement And Inventory of New Hardware And Software
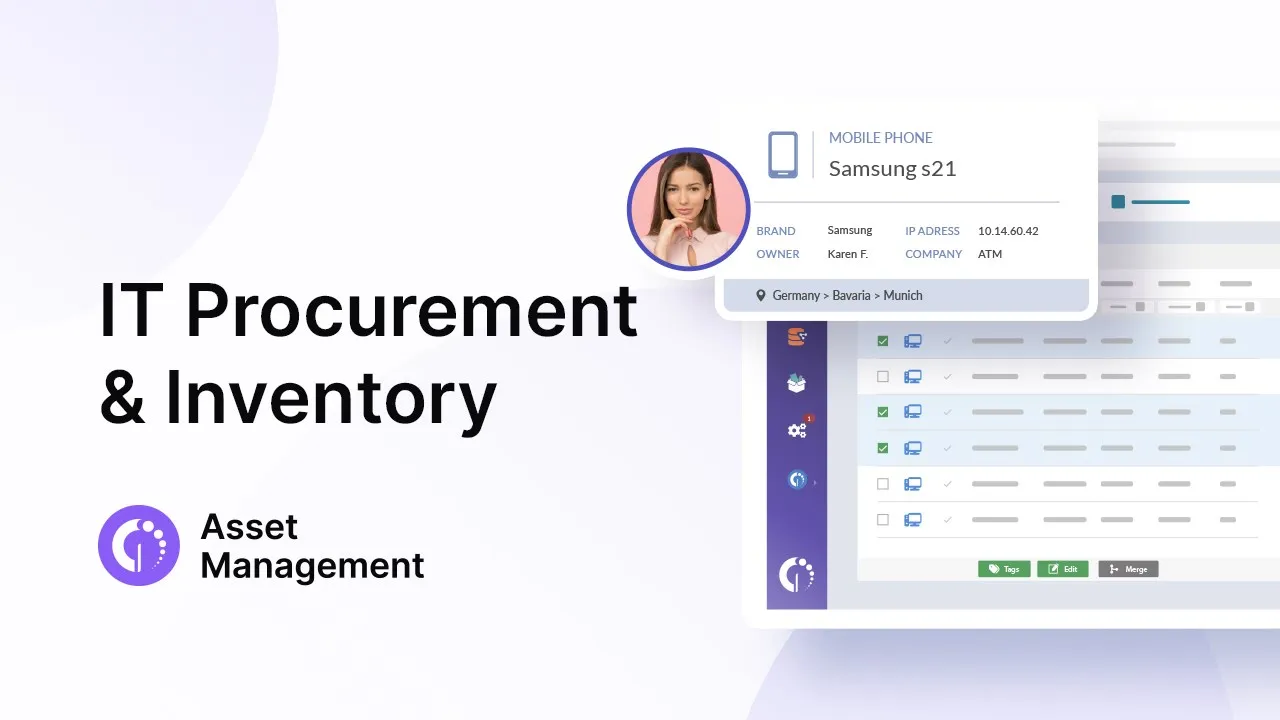
If your procurement and inventory process is already under control (and if not, we highly recommend checking out our complete guide to IT procurement), you’re ready for the next step: delivering the asset to its future user.
This stage is all about moving from "we own it" to "someone is responsible for it." And that starts with IT preparing the equipment for handover, usually as part of a new hire’s onboarding. When your delivery packet includes multi-page forms, organize and reorder PDF pages to keep handovers clear.
Here’s what that involves:
- Verifying that the asset is correctly registered in InvGate Asset Management.
- Tagging it (physically and digitally) and assigning the appropriate status — such as "Ready for deployment."
- Making sure the asset profile includes all relevant details (model, serial number, warranty, purchase date, etc.).
Pro tip: If you're using InvGate's inventory tools, like agent-based discovery or network discovery, all this data should already be there, saving time and reducing manual errors.
With the asset ready to go, it’s time to generate the delivery document.
Step 2 – Generate the delivery document

This is where you create a formal, trackable record of the handover. In InvGate Asset Management, you can generate a delivery document using a predefined template, and link it directly to the asset you’re assigning. Here’s how it works:
- Click "Create document" from the asset menu.
- Choose the appropriate template (for onboarding, replacement, offboarding, etc.)
- Fill in the required fields, such as recipient name, department, authorized person, and location.
- Select the asset(s) that will be included in the handover.
- Preview the document to make sure everything looks right.
- Click "Create and download" (the PDF is generated and automatically attached to the asset’s profile).
At this point:
- The document becomes visible in the asset’s Attachments section.
- A new entry is logged in the Activities tab, so you can always track when the document was created, by whom, and for which purpose.
Note: The document is not yet signed — this is the version that will be printed and handed over with the device. But it already lives in the system and creates a permanent digital trail.
Step 3 – Print, deliver, and collect the signature
.jpg?width=1280&height=784&name=webdemo.is.cloud.invgate.net_%20(11).jpg)
Now that the delivery document is ready, it’s time for the actual handover. This step usually involves a quick face-to-face interaction — but it's also the one most likely to fall through the cracks if not done properly.
Here’s what to do:
- Print the delivery document generated in Step 2.
- Physically deliver the asset to the new employee (or whoever is receiving it).
- Have them sign the document to acknowledge receipt and responsibility.
This signed copy is key. It’s the confirmation that the asset has changed hands, and it protects both IT and the employee by making the transaction official.
Optional but useful: You can also ask the recipient to check the asset details (serial number, condition, included accessories) before signing. This avoids confusion or disputes later on.
Once signed, you’re ready for the final step — digitizing the signed proof and completing the traceability loop.
Step 4 – Upload the signed copy
With the printed document signed and the asset handed over, the final step is to bring that proof back into the system. Here’s how to do it:
- Scan or photograph the signed document. Make sure the signature is clearly visible and all asset details are readable.
- Go to the asset profile in InvGate Asset Management.
- Upload the file in the "Attachments" section.
- Done! The document is now permanently stored and timestamped.
This action will also:
- Create a new entry in the Activities tab, so you’ll see exactly when the signed document was uploaded.
- Ensure that both the original (unsigned) and the final (signed) versions are stored together — giving you a complete audit trail.
Tip: If your internal process includes someone validating the signed document (e.g., HR or IT supervisor), you can add a comment or tag to the activity to mark it as verified.
With this final step, the asset is officially in the employee’s hands — and you have the digital records to prove it.
Add workflows to boost traceability and accountability
No-Code Workflow Builder: Automate Processes Across Your Business!
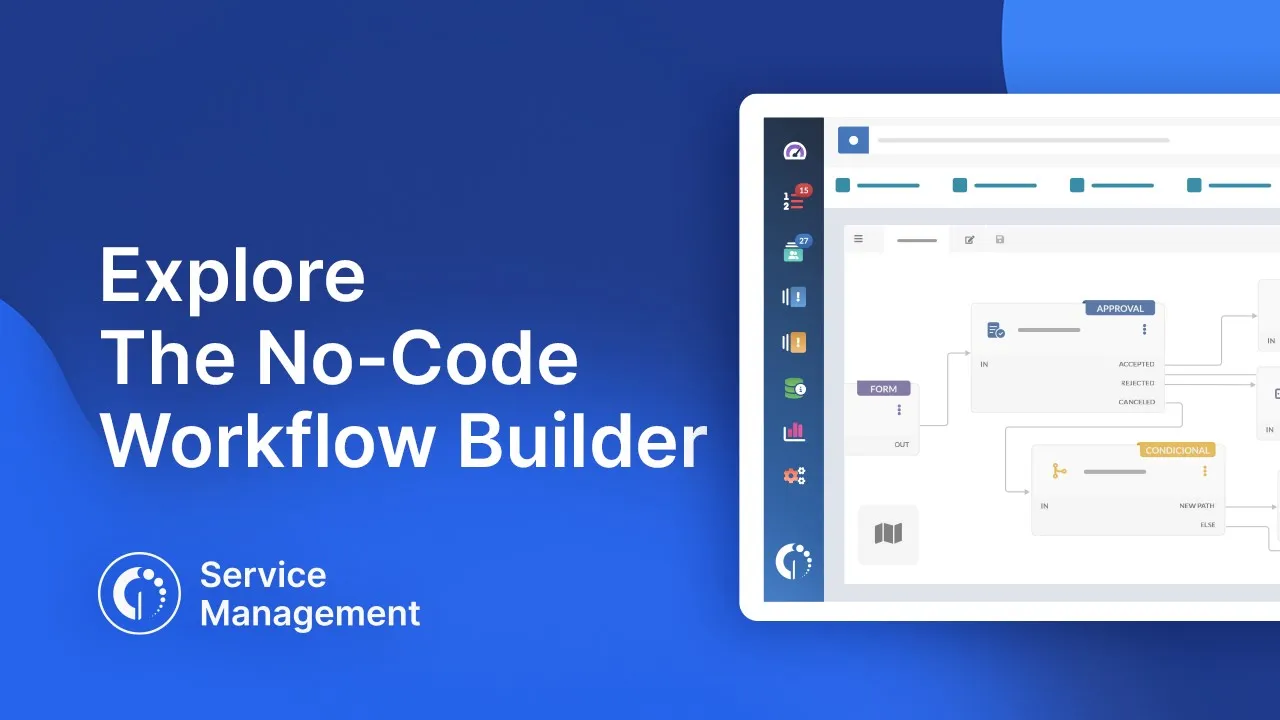
If you want to take your asset handover process even further, consider combining InvGate Asset Management with InvGate Service Management. This integration allows you to build custom workflows and automate actions — adding an extra layer of traceability and accountability.
While this step isn’t required to track assets, it helps ensure the right people are notified at the right time, and that nothing falls through the cracks.
For example, with the right workflow in InvGate Service Management, you can:
- Automatically notify HR when a delivery document is created for a new hire.
- Send reminders if the signed document hasn’t been uploaded within a set timeframe.
- Escalate to a supervisor if no confirmation is received after delivery.
- Trigger validation tasks or approval steps based on asset assignments.
This setup is ideal for teams looking to standardize handovers, add checkpoints, or align IT and HR responsibilities, all while keeping the full activity history in the asset’s profile.
Wrapping up
Employee onboarding comes with enough moving parts — tracking IT assets shouldn’t be one of the headaches. By using InvGate Asset Management to generate, store, and trace delivery documents, you can turn a paper-heavy process into a streamlined, auditable flow.
And if you pair it with InvGate Service Management, you’ll take control to a whole new level with smart automation. Simple, secure, and fully traceable, just how asset handovers should be.

