


Every change introduces uncertainty: service impact, security exposure, compliance gaps, or unintended downtime. When changes aren’t governed through a defined process, organizations lose their ability to assess risk consistently, apply the right approvals, and verify outcomes before and after implementation.
Automating Change Management helps preserve that control without adding unnecessary overhead. A no-code workflow turns policy into execution: required fields, approval steps, risk-based paths, and validations happen by default, not by memory.
With InvGate Service Management, change automation is practical: the workflow enforces control, while the no-code setup keeps configuration accessible to service managers and process owners.
How to Build a Change Management Workflow

Why do you need to automate Change Management?
Change is a technical activity that alters live services, infrastructure, or configurations. Because those changes carry risk, organizations rely on change management to apply structure: risk assessment, approvals, implementation controls, and verification. Automation matters because that structure cannot be enforced reliably through manual coordination.
Automated Change Management turns policy into execution from the very first step:
-
Automation enforces structure at the moment a change is requested
Instead of relying on informal descriptions, automated workflows require impact, risk, scope, and rollback details upfront. Changes enter the system in a reviewable, auditable state rather than as loosely defined requests. -
Risk-based control happens automatically, not selectively
Automated routing applies the appropriate approval and review path based on risk and impact. High-risk changes trigger stricter controls, while standard changes follow predefined paths without unnecessary delay. -
Approvals and accountability are built into the process
Automation assigns approvers, records decisions, and prevents execution until the required sign-offs are complete. Control doesn’t depend on reminders or manual checks. -
Auditable evidence is produced as part of execution
Every decision, approval, and status change is logged automatically. That record supports audits, post-incident reviews, and compliance requirements without reconstructing timelines after the fact. -
Even fast changes remain governed
Emergency and expedited changes still follow a controlled path. Automation captures justification, authorization, and post-implementation review so speed doesn’t eliminate oversight.
Automating Change Management isn’t about speeding things up for convenience. It’s about making change control enforceable, repeatable, and verifiable in environments where manual discipline alone isn’t enough.
Recommended reading
Read Article
New InvGate Service Management’s No-Code Workflow Builder
Types of changes that can be automated
In practice, most change types can be automated to some degree. ITIL defines three primary types of change: standard, emergency, and normal. However, although these are a great starting point, remember the best guidelines will always be those that align with your business's unique needs.
The difference lies in how much control, review, and human judgment the workflow applies.
-
Standard changes
Best suited for end-to-end automation. These are repeatable, low-risk changes with predefined steps and approvals, which makes them ideal for pre-approved workflows. -
Normal changes
Commonly automated with structured checkpoints. Automation supports risk assessment, approval routing, scheduling, and post-implementation review while keeping decision-making in human hands. -
Emergency changes
Automated with tighter guardrails. Workflows capture justification, apply expedited approvals, and enforce post-implementation review so urgency doesn’t bypass accountability.
Recommended reading
Read Article
Change Request: Definition, Form, And Free Workflow Template
What do you need to implement this automation?
To automate Change Management, teams first need shared agreements on how change is controlled. Automation can enforce rules, but it can’t define them. The basics below establish what information matters, who makes decisions, and what needs to happen before and after a change is implemented.
- Defined change types: A clear distinction between standard, normal, emergency, and high-risk changes, with agreed criteria for each.
- Risk and impact information: A consistent way to capture scope, affected services, dependencies, and potential impact before implementation.
- Approval paths: Known approvers for each change type and risk level, including escalation when needed.
- Implementation and rollback details: Documented steps for execution and recovery, especially for production changes.
- Post-implementation checks: A way to confirm outcomes, record issues, and close the change with evidence.
To put that process into operation, you need a tool that supports structured workflows rather than free-form ticket handling. Change workflows provide a consistent starting point, conditional logic adapts the flow based on risk or change type, and approval mechanisms control progression without manual checks. Automation should also record every decision, status change, and outcome as part of the workflow, so change activity remains traceable for audits, reviews, and continuous improvement.
8 steps to build a Change Management workflow in InvGate Service Management
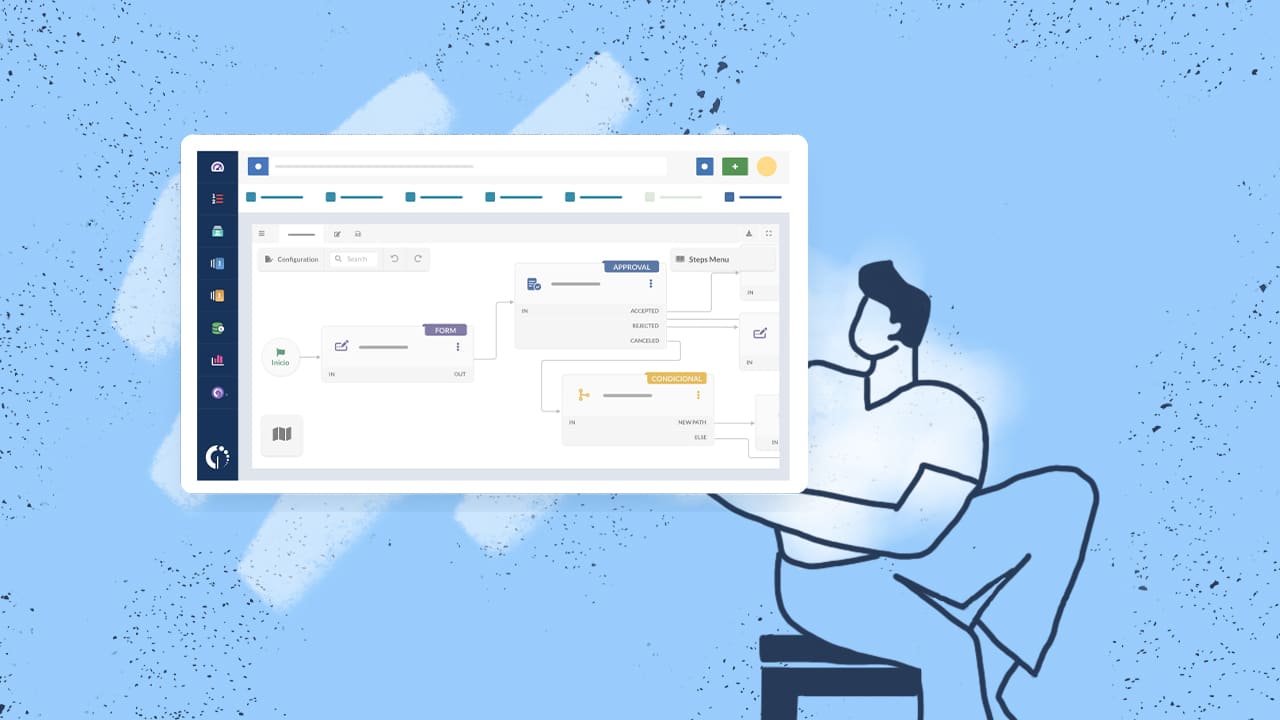
InvGate Service Management includes built-in workflow templates that you can adapt to your Change Management process. We’ll walk through how to configure the workflow, starting with a template and adjusting it to reflect your common control points such as approvals, communication, implementation, and review.
To get started, log in with an admin role and go to Settings > Requests > Workflows. From the templates list, select Request for Change and click Use template. This opens the workflow in the Diagram Editor, where you can view and modify each step of the process.
Step 1: Configure the start form (change request form)
The workflow begins with the Start form, which is completed by the user when they submit a Change Request. This form is both the entry point of the workflow and the primary source of information used for assessment and routing.
You can add, remove, or modify fields, and decide which ones are mandatory. Common fields include:
- Change type (Standard, Normal, Emergency).
- Change description.
- Reason for the change.
- Affected configuration items.
- Planned date, time, and duration.
- Implementation plan.
- Rollback plan.
- Supporting documents or attachments.
Step 2: Assess risk and impact
Once the request is submitted, a conditional block will define how the change should be handled. These values determine which approval path the change follows and how much control is applied.
According to the Change type field defined in the start form, it routes the request accordingly:
-
Emergency changes: Routed to the ECAB path, where risk and impact will be assessed by the emergency approval group.
-
Normal changes: Routed to the CAB path, where risk and impact assessment and approval are required.
-
Else path: Used for changes that don’t require formal risk and impact assessment or CAB approval, such as pre-approved or low-risk changes.
For changes routed to CAB or ECAB, the next step is a risk and impact assessment form. This is a form block completed by the responsible reviewers, not an automated evaluation.
In this step, reviewers select values such as:
- Risk level (High, Medium, Low)
- Impact level (High, Medium, Low)
These values provide structured input for decision-making and remain part of the change record for audit and review purposes. Once the form is completed, the workflow continues to the approval stage.
Step 3: Approve or reject the change
After risk and impact are recorded, the change is sent for approval to the corresponding group, either CAB or ECAB.
- If the change is rejected, the workflow follows a path that notifies the requester and closes the request with the appropriate step to notify stakeholders when a change is not authorized.
- If the change is approved, or if it followed the Else path and skipped assessment and approval, the workflow continues to the communication stage.
Step 4: Communicate the planned change
After approval, the change needs to be communicated to the teams or users affected. This step focuses on visibility and coordination rather than decision-making.
You can automate notifications, create tasks for communication activities, or use web service calls to integrate with external tools such as calendars. For example, a scheduled change can automatically create a calendar event showing implementation timing and scope.
Step 5: Execute the change
Approved changes move into the implementation stage. This step includes a task list that defines what needs to be done, when, and by whom.
Tasks can be mandatory or optional, have due dates, and be assigned to specific teams or individuals. You can also allow new tasks to be added during execution to handle unforeseen work.
All implementation activity should be documented, since this information feeds directly into the review stage.
Step 6: Review the change and decide on rollback
Once implementation is complete, the workflow moves into a review stage. Here, reviewers confirm whether the change was successful and whether it followed the plan.
Review forms usually include:
- Change outcome.
- Deviations from the plan.
- Rollback actions taken (if any).
- Additional observations or notes.
Based on this review, a conditional step determines whether a rollback is required. If so, the workflow triggers rollback tasks. If not, the change proceeds to closure.
Step 7: Close the change and notify stakeholders
The final step closes the workflow and notifies relevant stakeholders that the change is complete. At this point, the full record of the change — including approvals, tasks, outcomes, and decisions — is stored as part of the request history.
Step 8: Publish and assign the workflow
Once the workflow is ready:
- Save your changes.
- Click Publish version.
- Assign the workflow to the appropriate request category in the service catalog (for example, Change requests under IT).
From that moment on, every user submitting a change request through the portal will follow this automated workflow.
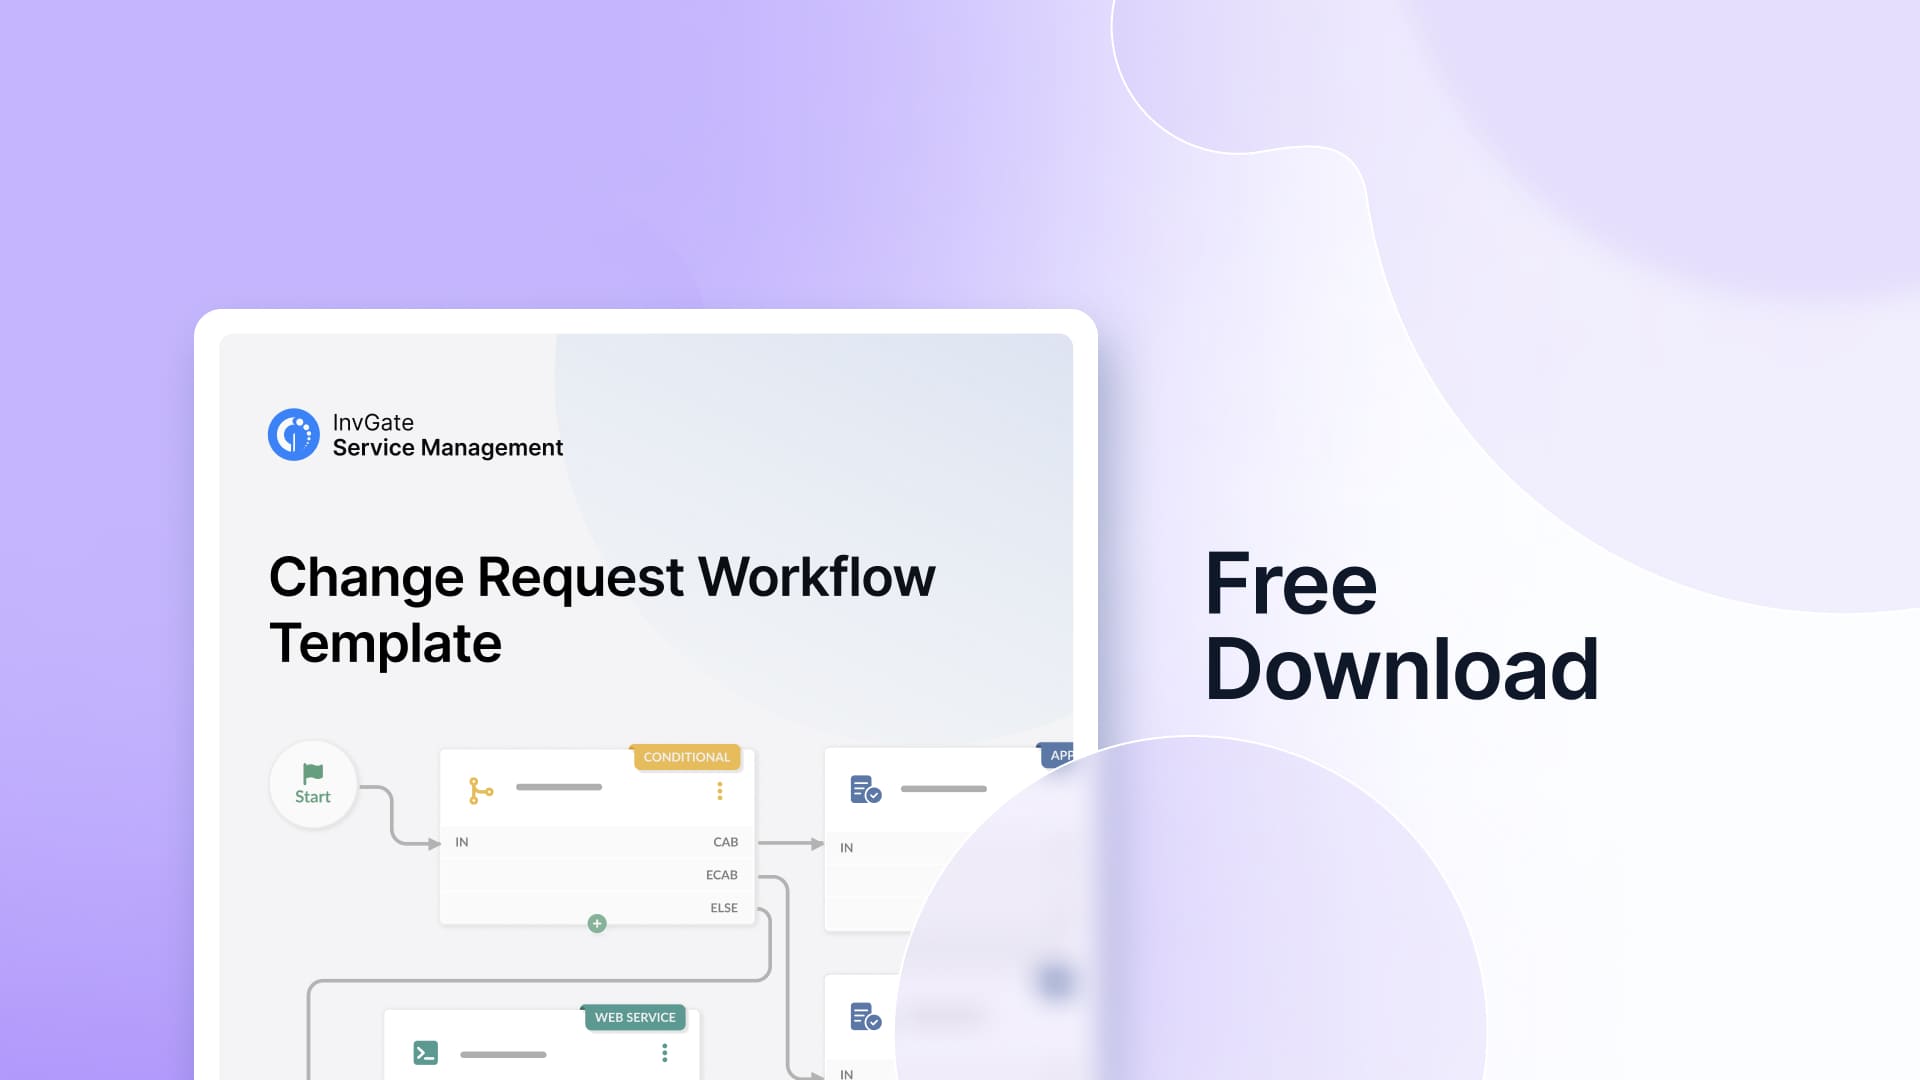
Download your free Change Management process flow template
Setting out a clear, well-structured Change Management workflow ensures changes are implemented in a controlled, efficient manner throughout your organization. It also helps guarantee that all involved parties are aware of the schedule and their responsibilities.
You can download the free change request workflow template and use it as a baseline for your own process.
Every organization handles change differently. What matters is aligning the workflow with how your teams operate, the services you support, and the level of control you need. That’s why flexibility matters when configuring change workflows.
InvGate Service Management includes a no-code workflow builder that lets you adapt each step without technical complexity. You can try it yourself with the 30-day free trial and start customizing your Change Management process!

