An equipment checkout system is essential for any organization, especially in industries like education, healthcare, and construction, where managing shared assets is a regular part of operations. Think about it – every minute spent searching for misplaced equipment or dealing with double-booked resources is a minute lost in productivity. You want to make sure that your valuable assets are always in the right hands at the right time.
In this blog post, we’ll guide you through setting up an efficient equipment check-out process to ensure that equipment is tracked and available when needed.
By the end, you’ll know how to implement a streamlined check-out system, and we’ll show you how InvGate Service Management combined with InvGate Asset Management can make the process a breeze.
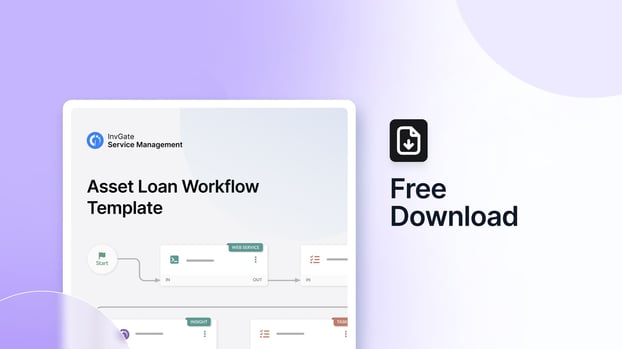
You can also download a free asset loan workflow template to get you started right away!

What is an equipment checkout system?
An equipment checkout system is a specialized software solution designed to streamline the process of managing and tracking various types of tools, devices, or assets within an organization. Essentially, it serves as a digital ledger for your equipment inventory, providing a structured and efficient way to loan, monitor, and maintain equipment.
The primary function of an equipment checkout system is to automate and simplify the management of equipment throughout its lifecycle.
What is an equipment check-out template?
An equipment check-out template is a predefined workflow that helps organize and automate the process of managing shared assets within an organization. It defines each step — from requesting equipment to tracking its return — ensuring a consistent and efficient system.
Using a template is the best way to standardize the entire process and automate many of its steps. This way, it reduces the manual effort required to track equipment, prevents errors, and ensures assets are returned on time. It also allows for better oversight, so you’ll be able to monitor the usage of the assets and their availability in real-time.
Benefits of using an equipment checkout template
Implementing an equipment check-out workflow can significantly enhance the management of shared assets within your organization. A template ensures that all transactions, requesting, checking out, and returning equipment are handled consistently.
- Higher accountability: An equipment checkout system promotes employee accountability and reduces the risk of loss or misuse by keeping a clear record of who checked out what equipment and when.
- Reduced errors: A standardized process reduces room for mistakes, helping to prevent issues like overbooking or misplacing assets.
- Stronger Compliance Management: Organizations can maintain accurate records for compliance purposes and leverage reports for data-driven insights to make informed decisions.
- Increased productivity: Users can quickly locate and access the necessary equipment, minimizing downtime and maximizing productivity.
- Time savings: Automating routine tasks, such as sending reminders for return deadlines or updating inventory records, saves time and reduces errors.

How InvGate Service Management’s no-code workflow builder can help

The no-code workflow builder in InvGate Service Management enables you to create customized templates for managing the lending of assets within your organization.
You can use the workflow template to standardize and streamline asset loans, making it easier to control inventory while ensuring that each employee has access to the equipment they need.
The workflow includes steps such as assigning IT tasks, changing ownership of assets, and updating inventory status, all integrated seamlessly with InvGate Asset Management. This allows for real-time tracking and management of your assets. With InvGate Service Management’s no-code workflow builder, you can create an effective and reliable process for managing your organization’s assets.
Download your free equipment checkout workflow template
You don’t have to rely on manual efforts any longer. Download our free equipment checkout workflow template and start automating your approvals today. Using InvGate Service Management’s no-code workflows in conjunction with InvGate Asset Management, you can enhance efficiency and accountability in your equipment management process.
Automating these workflows saves you time, reduces errors, and ensures that employees have quick access to the hardware they need. Take control of your asset lending process and simplify your operations.
Build your equipment request workflow
With InvGate Asset Management and InvGate Service Management, you can build a simple check-out request that automatically marks the asset as loaned out and provides a straightforward audit trail of who has what.
Before getting into action, keep in mind that you have to configure the integration of both tools to make sure you can get the most out of this ITSM and ITAM power couple. Are your eyes glazing over? Let's get right to the step-by-step process that covers the whole cycle.
Equipment checkout workflow steps
1- Start:
The request process starts with employees completing a form with all the essential information, such as the desired loan dates, the type of Configuration Item users wish to reserve, and any additional comments. You can customize this form to collect the information that matters most to your organization.
- Populating the calendar
In this step, your calendar will automatically be populated with reservations through an API call. This is crucial to prevent scheduling conflicts.
- Assigning IT tasks
Then, you can assign tasks to your tier 1 IT team to validate and prepare loaner assets for check-out. These tasks could include preparing the loaner, confirming the reservation's accuracy, and conducting a final check to ensure that the assets are in optimal condition before they are loaned out.
- Assigning the user
This is an API call to InvGate Asset Management to mark the asset as "loaned on loan automatically" and set the owner as the person who requested it.
- Collecting returned loaners
When users return the loaner equipment, the agents are prompted with a task instructing them to initiate the collection process. When agents collect the equipment, they can mark it as received and the loan completed. The workflow then moves on to the last step.
- Return to inventory
This step completes the cycle. It is another API call to InvGate Asset Management to mark the loaner as "back and ready to loan" while removing the owner it had assigned. Now, the equipment is ready and available for other users.
Creating request items
Before using the workflow outlined above, you'll need to create request items in the catalog. This will act as the starting point for users to submit their equipment checkout requests, who will select the loaner equipment from the list you provide.
Go to “Catalog” to create a request item, such as “Loaner Laptop.” You can customize it by adding an icon, providing a description, and including relevant search terms. Then, associate the requested item with the workflow.
Remember that you can load your assets into InvGate Asset Management to kickstart your asset booking and check-out system. Make sure that these assets are properly marked as "ready to loan" (or any custom status you want), in the correct location, and without any owner assigned.
And this is how you can build a check-in and check-out process using both InvGate Service Management and InvGate Asset Management. You can have your system up and running in just a few simple steps without any additional implementations!
Key takeaways
An efficient equipment check-out system is a necessity for organizations in various industries, as the ability to loan and track different types of equipment or assets curbs unnecessary costs and elevates accountability.
However, the real game-changer lies in the integration of ITAM software, and a prime example of this is InvGate Asset Management. By adopting this type of solution for your equipment check-out system, you empower your organization with a new level of control and efficiency — all in just a few easy steps.
Are you eager to put this innovative solution to work for your organization? Request InvGate Asset Management's 30-day free trial today and experience the difference!
Frequently Asked Questions
What is equipment checkout?
Equipment checkout is the process of loaning equipment to users or employees for temporary use, typically recorded to track who borrowed the equipment and when.
What is check-in and check-out in Asset Management?
Check-in and check-out in Asset Management is the practice of recording when assets are taken from or returned to inventory. It helps maintain accountability and visibility of asset movement.
How do you track employee equipment?
You can track employee equipment by assigning them specific assets, recording their details, and using an Asset Management system to monitor equipment assignments and usage.
How does a check-in check-out system work?
A check-in/check-out system works by allowing users to request and check out assets, timestamping check-out transactions, and providing real-time visibility into asset availability and location for efficient Asset Management.


