An SLA policy sets clear expectations for response and resolution times, but when it’s poorly defined or inconsistently applied, support teams quickly lose control over priorities. Requests start piling up, deadlines slip, and users receive uneven service depending on who handles the ticket.
On InvGate Service Management, you can create and manage multiple SLAs in a few clicks. This article explains how to define SLA and SLO policies, and why a single SLA policy often falls short. How to create SLAs with InvGate Service Management
What is an SLA policy?
A Service Level Agreement or SLA policy defines the time-based commitments a service team makes when handling requests. In practical terms, it sets targets for response and resolution based on conditions like request type, priority, or service category.
In InvGate Service Management, SLA policies translate those commitments into measurable rules. The platform tracks time automatically, pauses counters when conditions apply, and flags tickets that are at risk of breaching agreed targets. That way, SLAs stop being theoretical promises and become part of daily operations.
SLO policies
SLO (Service Level Objective) policies focus on internal performance goals rather than formal agreements with users. While SLAs usually define what the organization commits to externally, SLOs describe how the team plans to operate internally to meet or exceed those commitments.
SLO policies complement SLAs by allowing teams to monitor internal benchmarks without exposing them to end users. For example, a team might set an SLO to respond within one hour, even if the SLA allows four. That extra buffer helps teams stay ahead of deadlines and spot process issues early.
When are multiple SLA policies needed?
A single SLA policy works only when all requests are treated the same way. In real environments, that’s rarely the case. Different services, users, and priorities demand different response and resolution targets.
Multiple SLA policies become necessary when:
-
Services vary in urgency or impact. An incident affecting a core system can’t follow the same timelines as a general request.
-
User groups have different expectations. Internal teams, external customers, or executives often require distinct service levels.
-
Support hours differ. Some services run 24/7, while others follow business hours, which directly affects time tracking.
-
Regulatory or contractual requirements apply. Certain requests may require stricter controls and shorter deadlines.
InvGate Service Management lets you apply several SLA policies simultaneously by using clear conditions. Each ticket automatically picks up the right policy based on its attributes, keeping enforcement consistent without adding manual work for the support team.
How to define an SLA policy in InvGate Service Management
To start, you need to go to Settings >> Request >> SLA. From there, you’ll be able to apply multiple SLA policies to different help desks according to the nature of the requests they process.
Let’s take a look at the various configuration options available.
Step 1: Understand the SLA metrics you can define
An SLA policy in InvGate Service Management is built around two core metrics:
-
First response SLA measures the time between when a request is created and when the first visible response is sent by a technical user. It reflects how quickly the team acknowledges the request, regardless of who responds first.
-
Resolution SLA tracks the time from request creation until the solution is accepted and the request is closed. It represents the full commitment to solving the issue.
Both metrics can be used independently or together, depending on how you want to measure service performance.
Step 2: Access the SLA configuration area
To create a Service Level Agreement, log in as an administrator and go to Settings > Requests > SLA & OLA. From there, choose whether you want to create a First response SLA or a Resolution SLA, then select Add to start configuring it.
When creating a new SLA policy, you have to set the conditions – such as the type of client and priority – and then configure the following:
- Subject
- Expiration time
- Pausing criteria (which can be custom or set to match the help desk schedule)
- Evaluation change (to enable the evaluation of different SLAs if there is any change on the request)
- Log time
- Expiration time visibility by the end-user
Step 3: Refine when the SLA policy applies using workflows
In the context of an SLA policy, conditions determine exactly when the SLA starts, stops, or changes behavior based on how the request evolves.
InvGate Service Management lets you use workflow fields and workflow stages as part of those conditions. That means the same SLA policy can adapt as a request moves through its lifecycle, instead of relying on static values set at creation time.
For example, a change request usually doesn't habe a defined urgency at creation time. The specific type — such as emergency, normal, or standard — is usually determined later, once the responsible team reviews the request.
If the workflow includes a field for change type, the SLA policy can wait until that value is set. Once the responsible defines the change as an emergency, a shorter SLA can be applied automatically. If it’s marked as a normal change, a different target applies instead.
Step 4: Define timing, pauses, and visibility
Once conditions are set, you configure how the SLA behaves:
-
Set the target time in hours or minutes.
-
Decide when the SLA should pause, such as outside business hours or during custom shifts.
-
Choose whether the SLA should be re-evaluated when the request changes.
-
Decide if customers should see an estimated response or resolution time.
These settings help align the SLA policy with real working hours and avoid counting time the team can’t control.
Step 5: Add actions for warnings and escalations
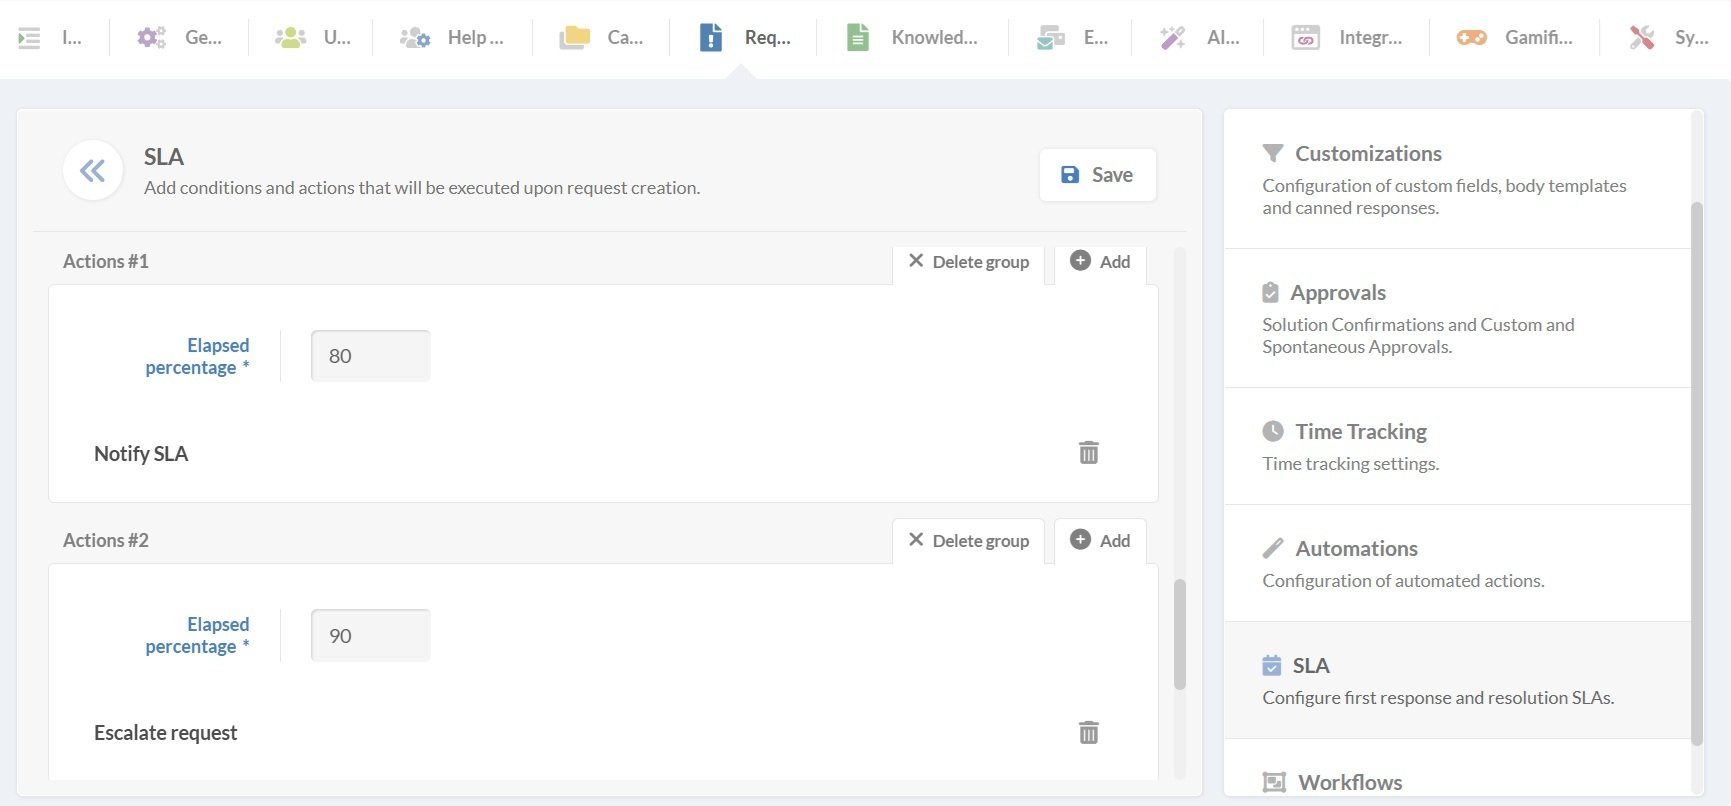
An SLA policy can trigger actions when certain time thresholds are reached. These actions support proactive handling before a breach happens.
Common actions include sending notifications, changing priority, escalating the request, or reassigning it to another team. For example, a request can be reassigned to a manager once 75% of the SLA time has passed.
After defining the actions, save the policy to activate it.
Step 6: Implement and manage multiple SLA policies
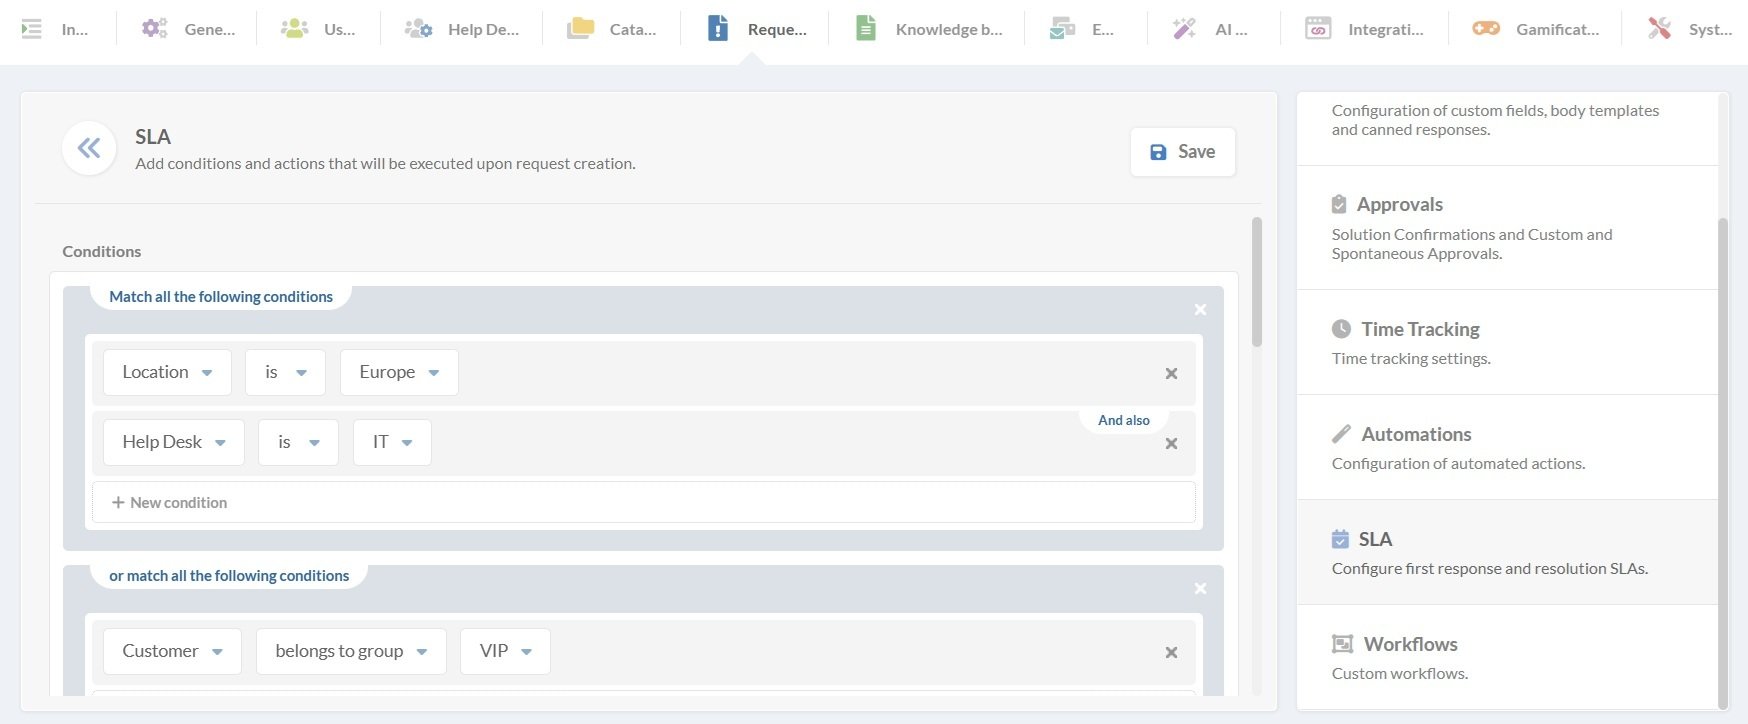
Most environments need more than one SLA policy. Different services, priorities, user groups, or schedules usually require different targets.
InvGate Service Management evaluates all SLA policies and applies the one that matches the request conditions. If more than one policy applies, the system uses the order defined in the SLA list, giving priority to the policy placed higher.
Organizing that order carefully allows multiple SLA policies to work together without conflicts, while still keeping the configuration manageable.
How to complement an SLA policy with SLOs
An SLA policy defines the service commitment made to users, but meeting that commitment depends on internal coordination. For that reason, teams use SLOs as internal performance targets that help them stay ahead of the SLA.
In practice, those SLOs need a way to be measured and enforced. In InvGate Service Management, that’s done through OLAs, which translate internal objectives into concrete time rules for support teams. OLAs work only at the internal level:
-
They are not visible to users.
-
They do not replace the SLA policy.
-
They exist to support internal SLOs that help teams meet the SLA consistently.
Each OLA supports the same external SLA, but from the perspective of internal handovers. Instead of one broad internal target, OLAs define time limits for each team or stage involved. They are intentionally tighter than the SLA, leaving buffer time for reassignment, escalation, or unexpected delays. If one handover takes too long, teams see it early, while there’s still time to recover before the SLA is at risk.
For example, a VIP request might have a shorter SLA than a standard one. Internally, that translates into stricter OLAs for the first support team, faster escalation to specialists, and shorter handling times at each step. Each OLA enforces part of the internal objective, while the SLA remains the single commitment visible to the user.
Other features that help you manage SLA policies
InvGate Service Management includes several supporting features that make SLA policies easier to track and manage day to day. Agents can see clear visual indicators directly on each ticket showing whether service level targets are running, paused, or exceeded, without opening separate reports.
SLA policies aren’t limited to IT. Different departments can work with their own policies, each aligned with their services and priorities. On top of that, customizable dashboards and reports make it easier to review performance over time and spot patterns across teams.
To reduce the risk of breaches, the platform also offers Smart Request Escalations, an AI-powered capability that helps identify tickets at risk and trigger timely actions before service level targets are missed.
Configuring a multiple SLA policy with InvGate Service Management is a simple process that allows you to adjust it to meet the needs of every help desk. Want to see it for yourself? Request our 30-day free trial!
