










If your organization already uses Jira for software development or project tracking and wants a service desk alongside it, the InvGate Service Management and Jira integration connects the two. It lets you link Jira issues to service desk requests, so agents get real-time detail on a Jira issue directly from InvGate Service Management, with no back-and-forth between platforms.
Here's what the integration does, how to set it up, and how it fits into your workflows.
At its core, the integration works as a bridge between your support team and the development or project management teams working in Jira. It gives agents the context behind a request — the related Jira issue and its current state — right inside InvGate Service Management, so no one has to jump between tools to find out where development stands.
In practice, once the tools are connected, authorized users can link Jira issues to requests and see the issue's details inside the request. The integration is compatible with Jira (which combines the former Jira Software and Jira Work Management) and with Jira Service Management, and the setup and behavior are the same across all of them.
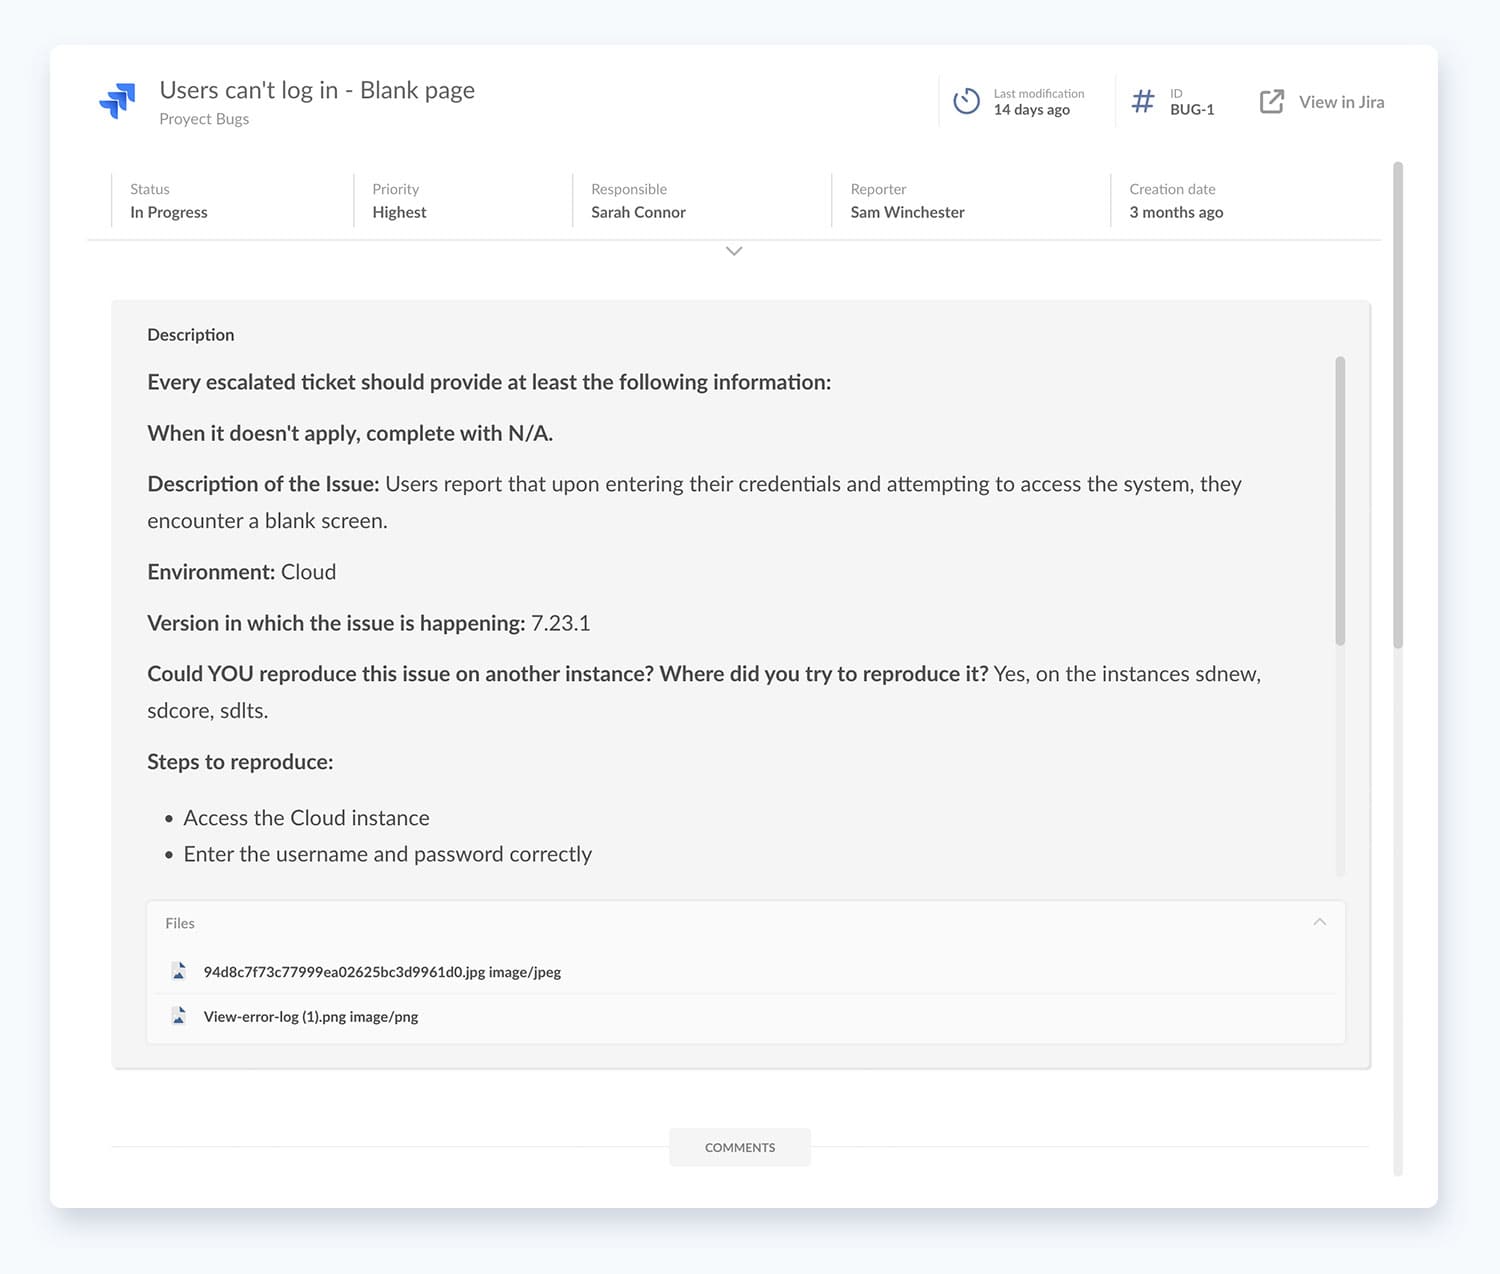
For a linked issue, users with the right permission can see the following information from Jira, in real time, without leaving InvGate Service Management:
No extra Jira licenses are needed. InvGate Service Management users do not require their own Jira license to view the details of a linked issue.
Scope and limitations to keep in mind:
Setting up the integration takes two steps: obtaining your API token from Jira, then configuring the integration in InvGate Service Management. For this article we use Jira Software to illustrate the setup, and the process is identical for Jira Work Management and Jira Service Management.
Log into your Jira instance with an administrator account that has permission to view and create issues in the projects you want to link to InvGate Service Management requests.
Go to Settings > Atlassian account settings. In the security section, click on "Create and manage API tokens," then click on the button to create a new token. Enter a descriptive name — for example, "InvGate Service Management" — and click on "Create."
Note: The API token appears only once, so copy and save it right away for the next step. Do not revoke this token later, as that will stop the integration from working.
Log into InvGate Service Management as an administrator and go to Settings > Integrations > Applications. Click on the add button for Jira.
The configuration screen is divided into three sections, and each one must be completed before you can save:
Save the changes to finish setting up the integration.
To link an issue, open a request in one of the enabled categories, click the add button for relationships, choose "Add external entity," select Jira, and enter the issue ID. The issue ID comes from Jira in the format [name]-[number], for example "BUG-1." The linked issue then appears on the request with its status, ID, and title, and users with view permission can open it to see the full details and comments.
If you'd like to see it in practice, you can try it with a 30-day free trial.
Linking issues to requests is not the only way to bring Jira into InvGate Service Management. Jira is also available as a built-in action connector you can incorporate into InvGate's no-code workflow builder to bring live Jira data into a process. These read-only connectors let admins pull data straight from Jira inside a workflow, so there is no need to build custom web service stages.
To add one, go to Workflows > stage > Action > Built-in action connectors, then pick Jira and choose the action. Here are the actions available:
Here's where this fits in practice. Take a Change Enablement workflow for a software release, where the change depends on development work tracked in Jira. At the review stage, before the change is approved, you can add a "Get an issue" action to surface the current status of the related Jira issue, or "Get issue transitions" to show which states it can still move to. Whoever assesses the change then sees the development state right alongside the change record, with the context they need to move it forward, all inside InvGate Service Management.


