


Support teams are used to receive requests of all kinds. When building a help desk from scratch, organizations use the 5-level structure to assign tickets according to the agents’ knowledge and expertise. This is a key step in order to properly solve problems as quickly as possible, and comply with SLAs.
The help desk and tiered structure allows you to organize groups of agents with different types of support. This means that you can structure the whole support system of your organization within InvGate Service Management.
To do so, you will use labels and sub-labels, making it easy to scale tickets, if necessary.
Let's see how you can build your own!
Building a help desk from scratch with InvGate Service Management
Before you start building your help desk, there are a few things you need to do. First, you have to create the users. InvGate Service Management provides you with three different ways to do it:
- Manually
- By importing them from LDAP (Active Directory, Microsoft Entra ID (formerly Azure Active Directory), Google G Suite, Office 365)
- By creating sample users
Once that’s done, it’s time to assign them a role:
- Admins can configure and see everything.
- Agents solve the requests of the assigned help desk. Their amount of autonomy depends on the permissions assigned by the administrator.
- End-users can only create requests and search the knowledge base.
Now that the users and their permits are in place, you’re ready to create a help desk.
To start, click on Settings >> Help Desks. In there, you’ll be able to build the help desk in the following ways:
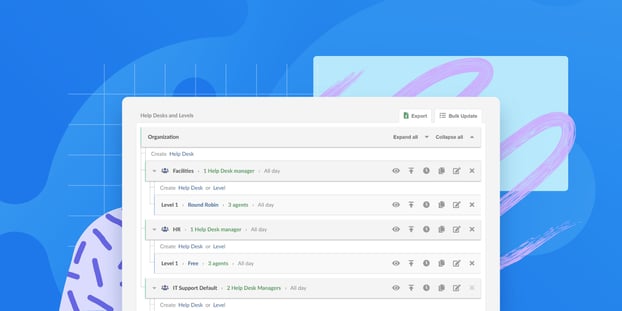
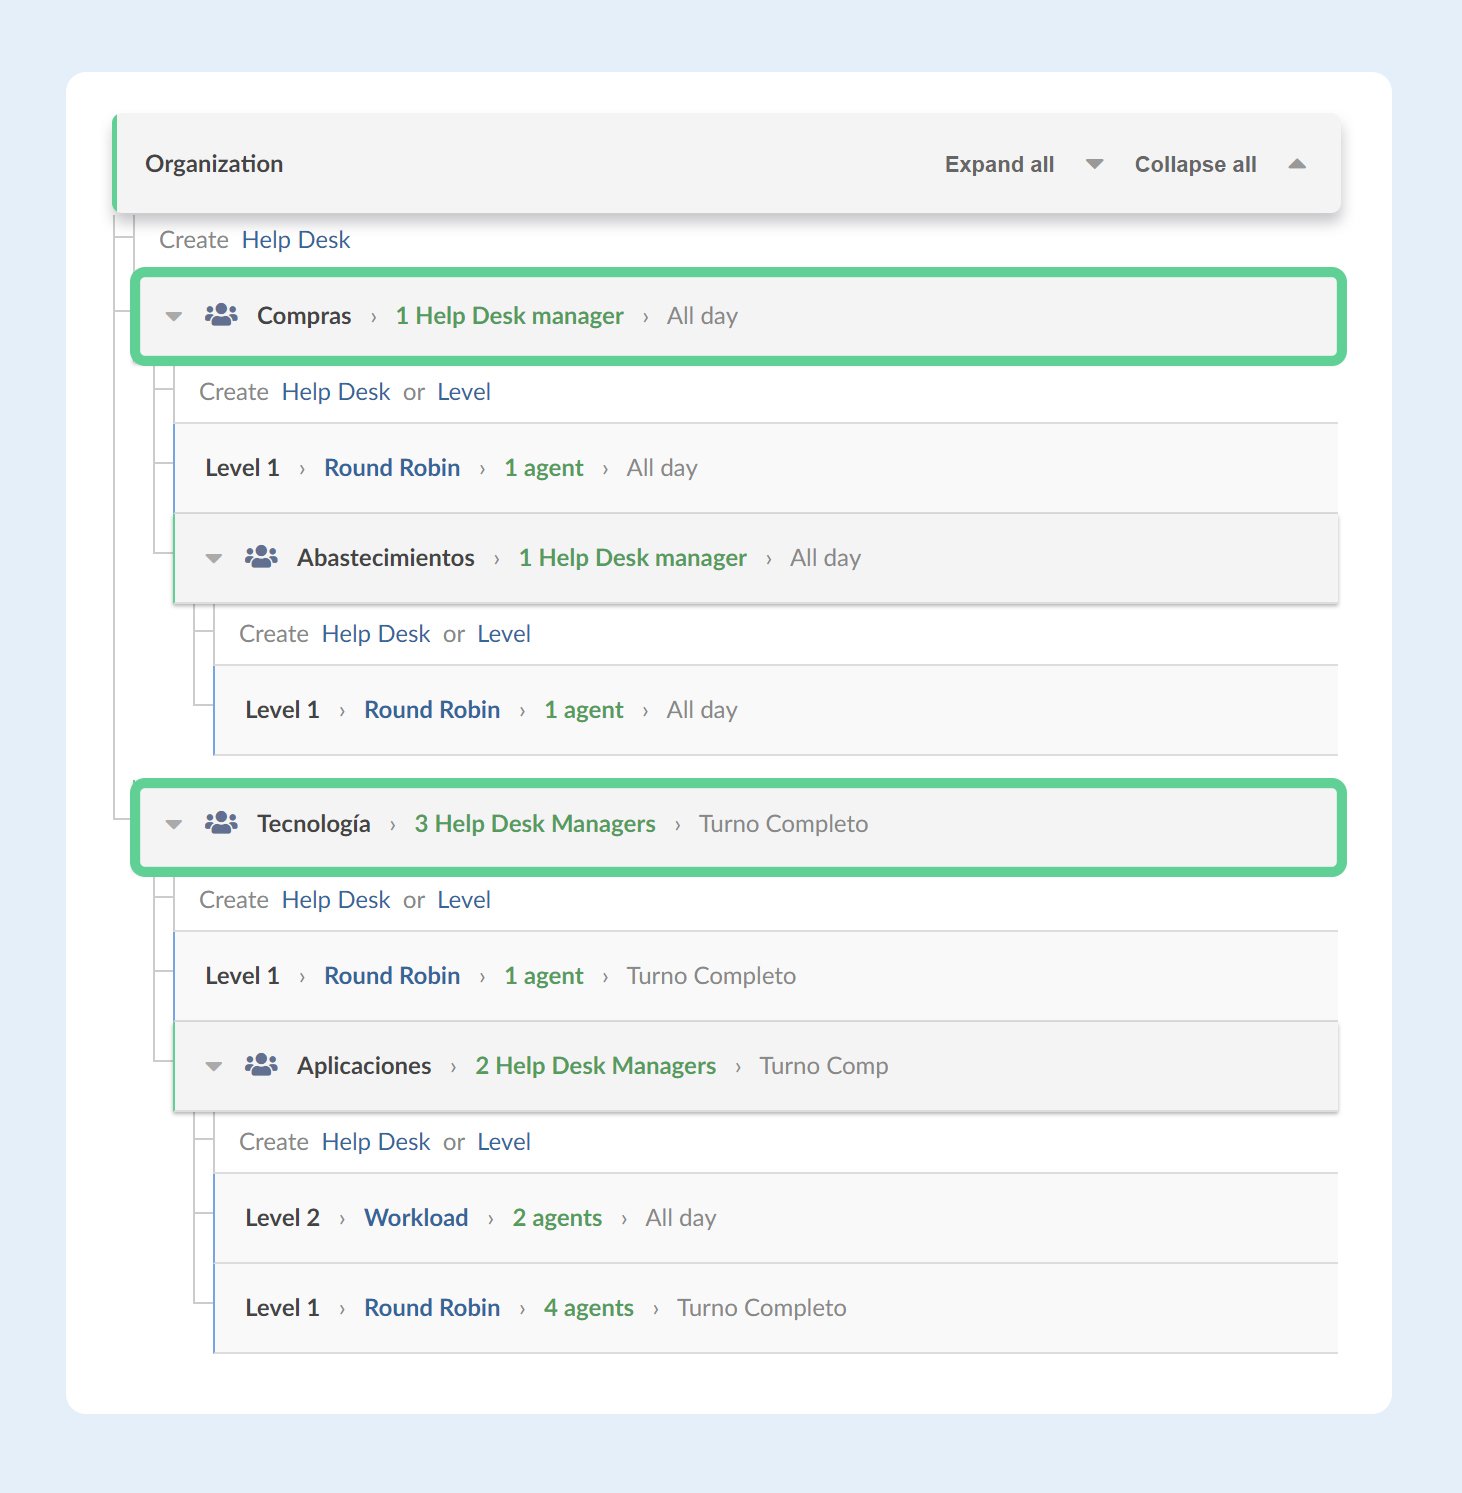
- Manually - Go to the “Help Desks and Levels” section to create a new help desk or label. You’ll be able to set up its name and parent hierarchy, and assign managers.
- By filling in a template - Click on the button “Import Help Desk” at the top of the menu, and download the file. Fill it out, upload it, and that’s it!
From Settings >> Help Desks, you’ll also be able to set up the default help desk (for unassigned requests), decide how to assign tickets (only within levels or also to other help desks), and whether users will be able to submit their own absences.
Next steps: configuring your new help desk
Now that you have your help desk in place, let's customize it to your team’s needs. In the help desk tree, next to each level, you will find shortcuts to configure the following:
- Working hours - Set up working shifts and assign them to the help desks.
- Observers - Add users that need to see what’s happening, without the cost of an extra license.
- Escalations - Configure the escalation route within the levels of the help desk.
- Assignment rules - Select the automatic rule to assign tickets that fits best your needs (Round Robin, workload, or free).
- Service catalogs - Set up the place where all new tickets will be created and assign a manager to them.


Free Trial
Yes (30 days)
To sum up
Having a properly built help desk will make your organization’s support tiers work as they should – meaning that requests will be assigned to the right agent, and will be properly escalated if needed. To do it in InvGate Service Management, all you need to do is follow a few steps:
- Import your users.
- Assign them a role.
- Create as many help desks and levels as you need.
- Customize your help desk to your team’s needs.
Sounds simple, right? Ask for a 30-day free trial and see it for yourself! And don't forget that this can be your first step toward an ITSM strategy - you can use this ITSM implementation checklist to guide you!

