mRemoteNG is a simple tool popular among IT professionals for efficiently managing multiple connections. The popularity of password managers has shown how much people don’t like typing in passwords every time they want to connect to a service. And IT professionals are all too familiar with the annoyance of manually typing in credentials every time they want to connect to a remote service.
mRemoteNG solves this problem for SysAdmins and IT teams, and in this article, we’ll explore how. We’ll also discuss how to use this tool and what alternatives are out there.
So, let’s dig in.
What is mRemoteNG?
mRemoteNG or multi-Remote Next Generation connection manager is a tool that helps you manage multiple diverse connections with remote systems. It can handle different types of connections, including Remote Desktop Protocol (RDP), Virtual Network Computing (VNC), Secure Shell (SSH), and others.
Remote connections are often a crucial part of the IT infrastructure. They’re used for configuring services and storing and sharing files from remote systems. In some organizations, users may store their information on a central server and never on personal workstations. Employees make a remote connection to the company servers.
Entering passwords is not fun; imagine having to type the password every time you want to connect to the Wi-Fi, and you’ll get a fair idea of what it's like to connect to a remote system without a tool like mRemoteNG.
mRemoteNG stores all the details and information needed to make remote connections, such as IP addresses, domain names, passwords, and others. It has an intuitive GUI with which you can easily manage all your connections. Once you’ve saved all the information needed, connecting to a remote system is as simple as just right-clicking on the connection from a list and clicking connect.
How to use mRemoteNG?
mRemoteNG is a handy tool if frequently connected to remote systems or servers. Remote connections are often used to troubleshoot systems, store files or programs in a central location, and many other applications.
Usually, when connecting remotely to a system, you must go through the Command Prompt or the Terminal. Of course, there are other tools with a GUI, but either way, you must enter your credentials and the information about the target system every time you want to remote into it.
With mRemoteNG, this process becomes more like connecting a Bluetooth headphone to your phone. The first time you connect, you need to pair (enter credentials, set up the connections), but it's just a click every time after this.
With mRemoteNG, you can also manage multiple connections at the same time. Every new connection you have will come up as a separate tab in this tool. So you can easily switch between different systems without any interruptions.
Steps to install mRemoteNG
Installing mRemoteNG is pretty straightforward.
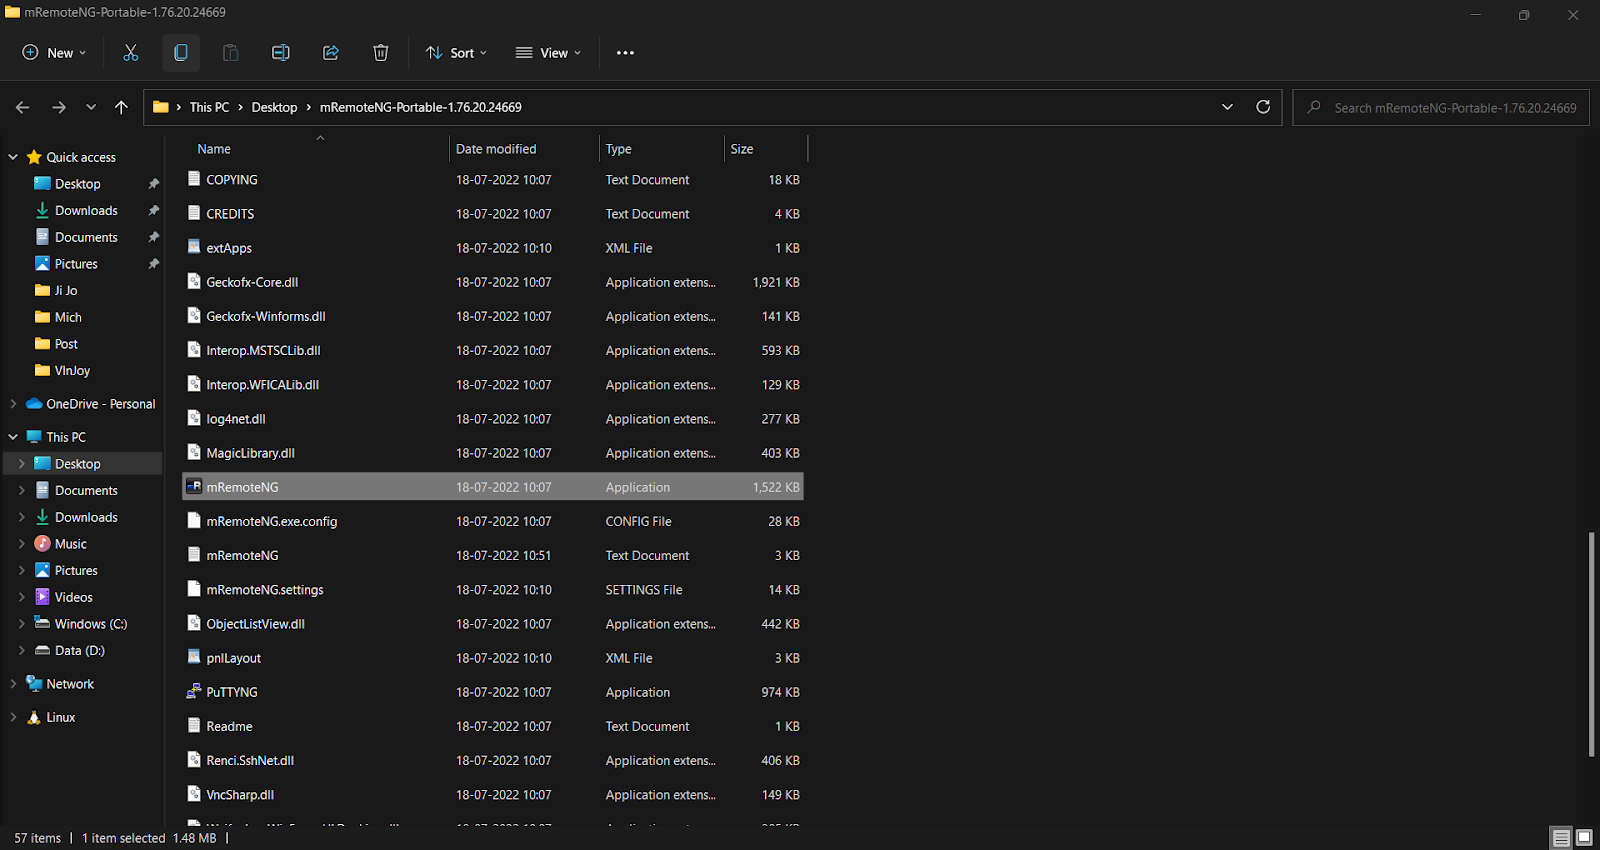
- Download the Zip file from https://mremoteng.org/download. Make sure you download the stable release unless, of course, you feel adventurous. Then, extract its contents.
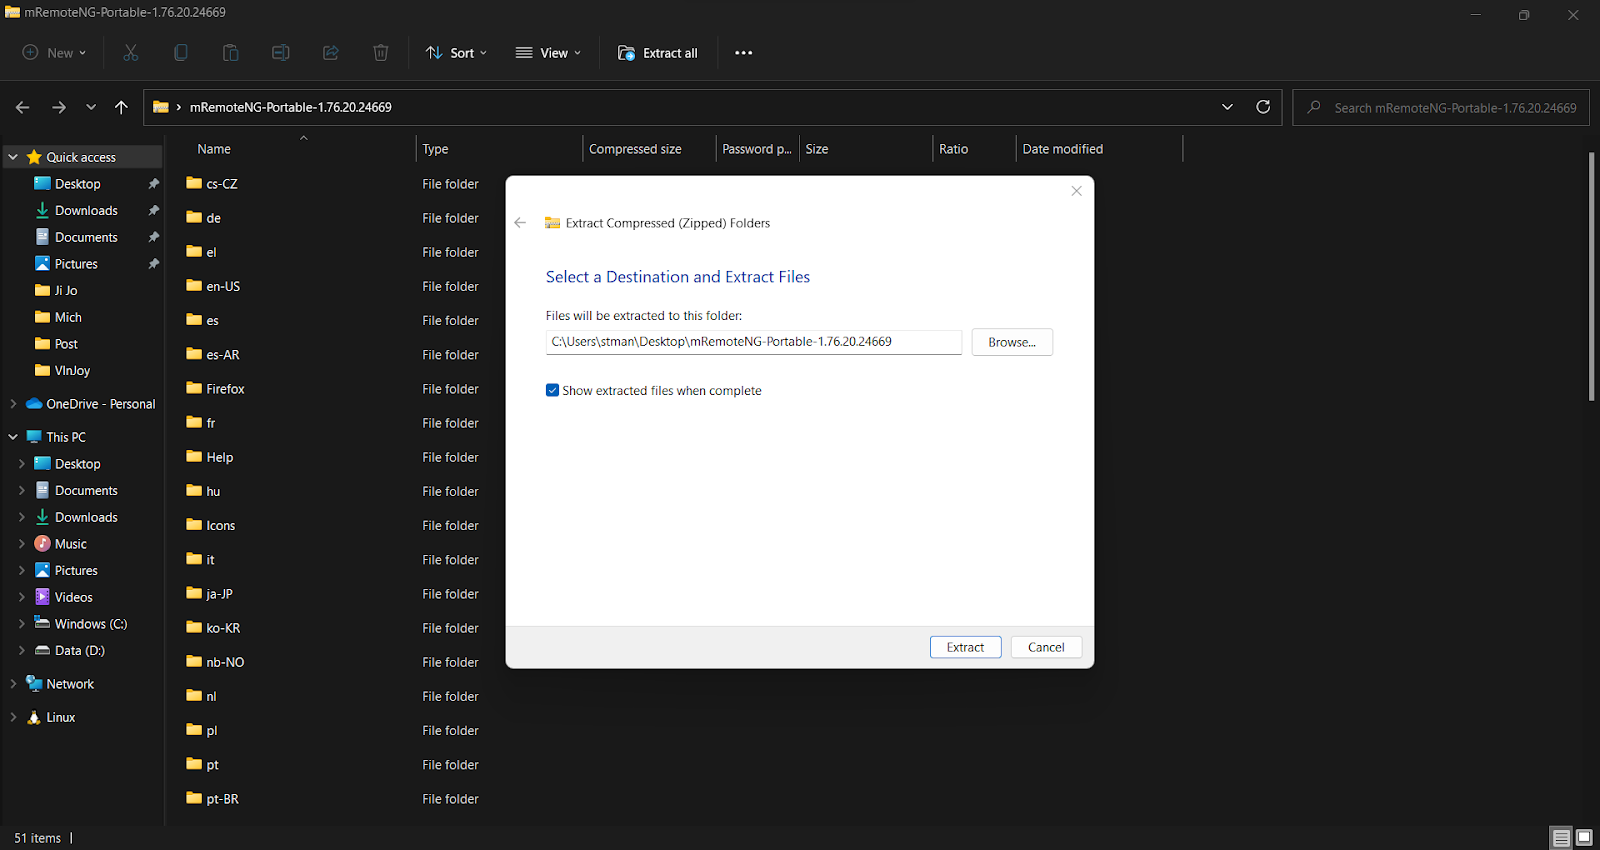
- Click the icon named mRemoteNG, as in the screenshot below. The application should open now.
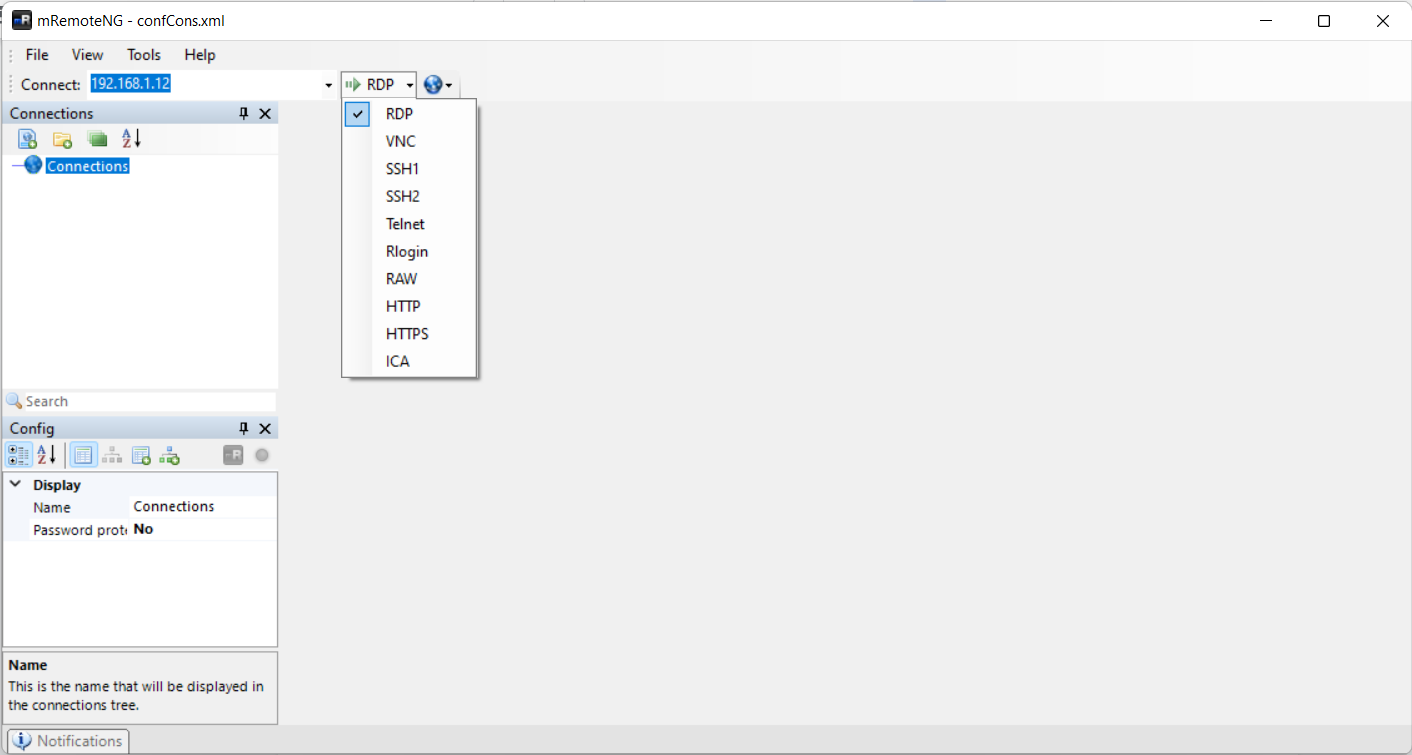
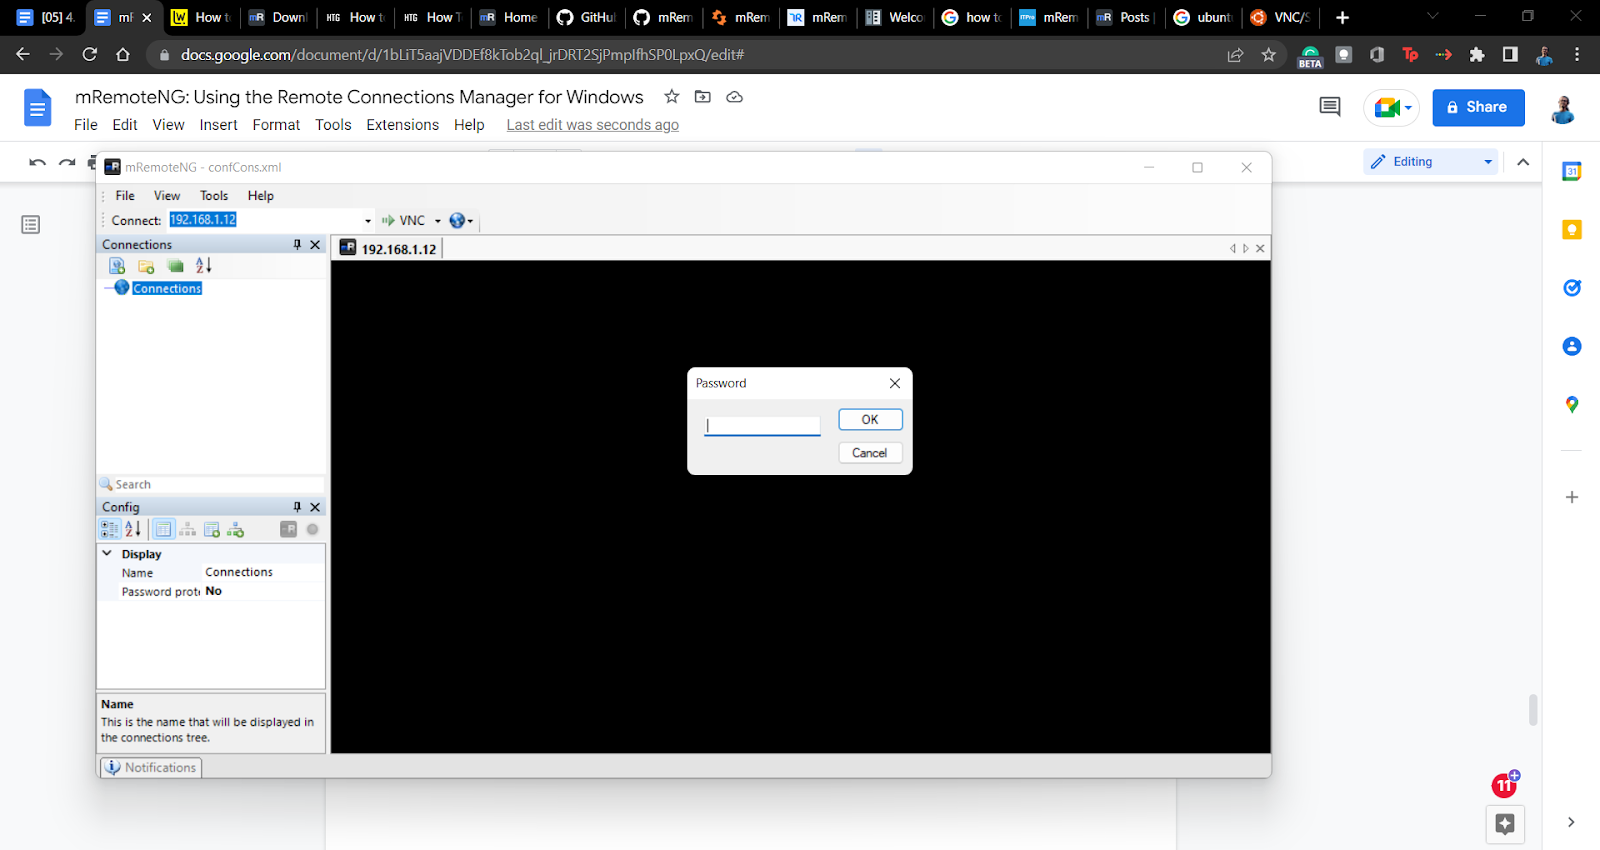
- To connect to the remote system, enter its IP address in the space next to “Connect.” In the below screenshot, we’re attempting to connect to 192.168.1.12.

- Next, click on the dropdown menu set to RDP by default, and choose the protocol you want to use. In this example, we'll use VNC to connect to an Ubuntu system PC. For this, you need to allow VNC on the target system.
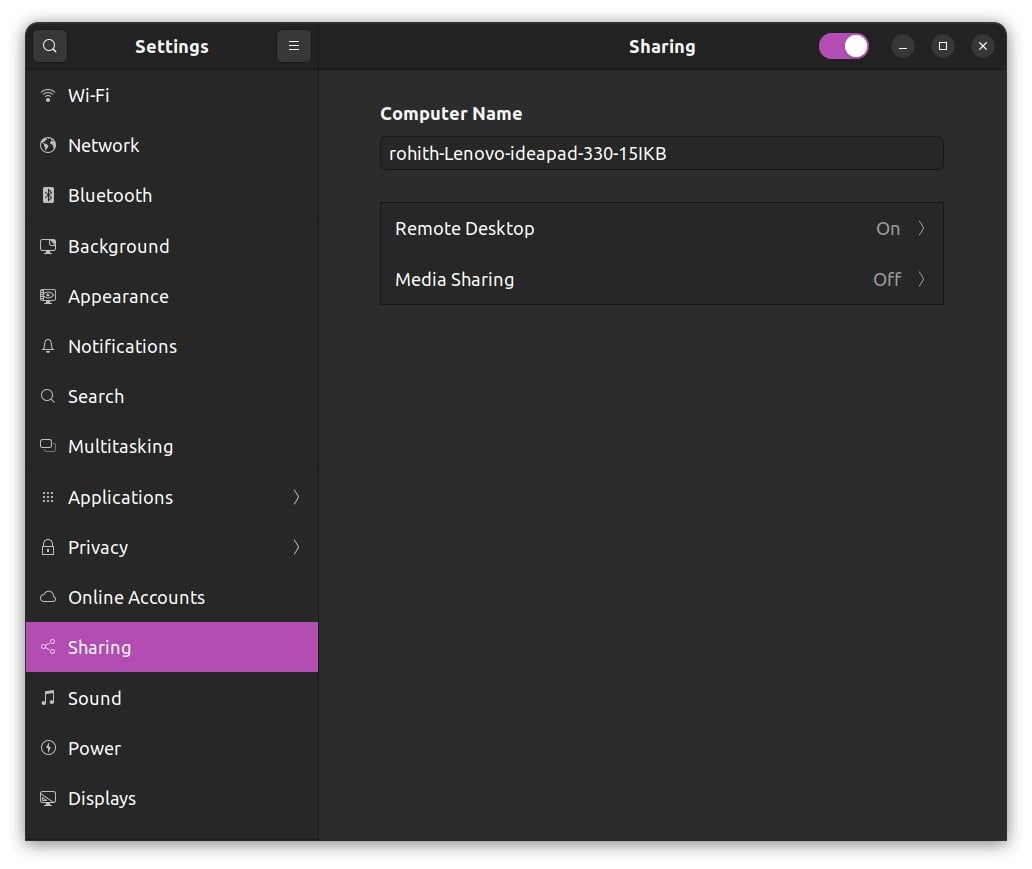
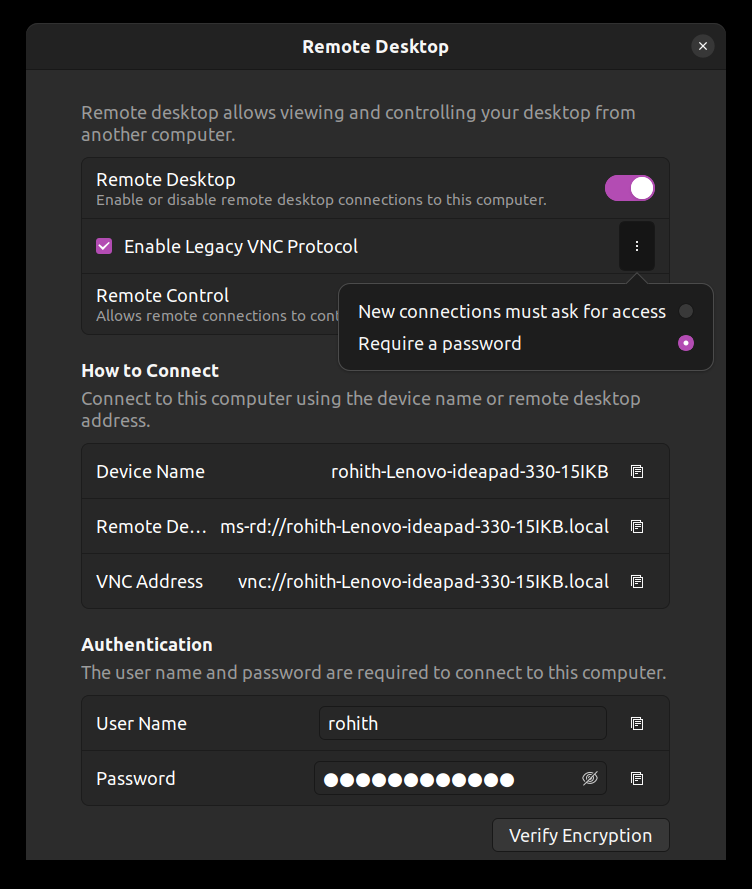
- Go to "Settings" and select "Sharing." Click on "Remote Desktop" and "Enable VNC protocol." There are two ways with which Ubuntu controls VNC access. One is with a password, and another is by manually allowing access every time you try to connect. Since the goal is to connect quickly with the minor intervention, you must do the password route.
- For this, click the three dots next to “Enable Legacy VNC Protocol” and choose “Require a password.”
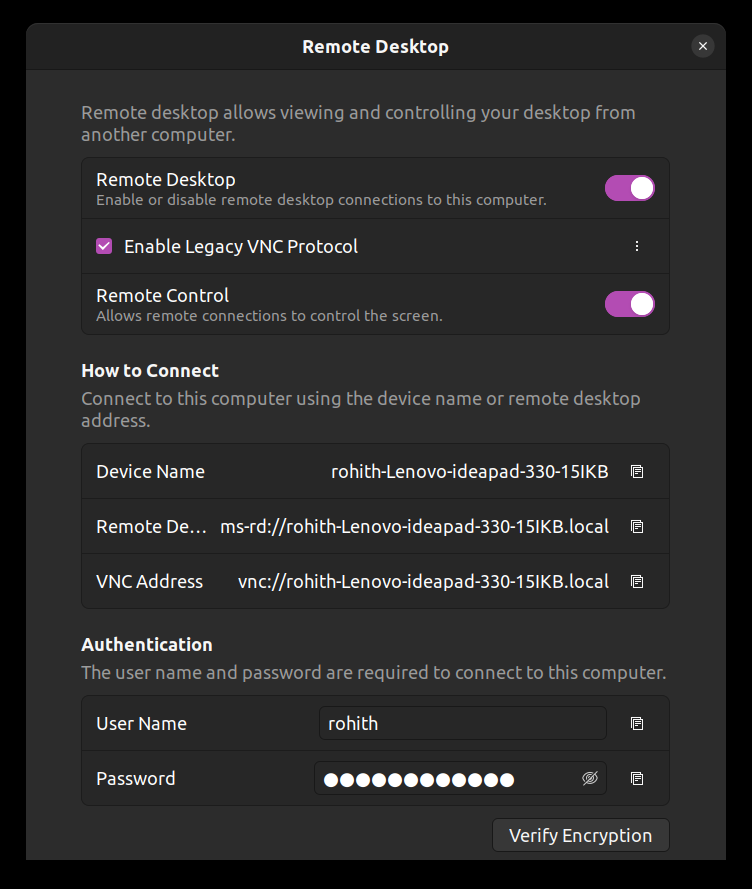
- Once you’ve configured this, open mRemoteNG in your system. Since you’ve already entered the system's IP address and selected VNC as the protocol, click on the green button, and you’ll be prompted to enter the password.
- Enter the password, and you’ll be connected. Of course, you can accomplish everything up until here with any other VNC tool. Now, let’s say that you want to connect frequently to this system. That’s where mRemoteNG comes in handy. Head to “File” and click on “New connection.”
- Enter the name for the new connection in the list of connections on the left side (this can be any name). And in the config pane below, enter the IP address, username, and password, and choose the protocol.
- The next time you want to connect to the same system, head to the connections list, choose the system you want to connect to, press the right click, and then select "Connect." Similarly, you can add info about other systems as well.
mRemoteNG alternatives
There are plenty of alternatives available for mRemoteNG. Here are two of the most popular:
- N-Able Take Control - This commercial solution was developed for service desk employees to access customer systems and help troubleshoot them quickly. It also comes with Android and iOS applications and promises connections in less than 8 seconds.
- Remote Desktop Manager - Remote Desktop Manager is another tool with which you can access multiple online systems simultaneously. The solution has free and enterprise editions. The enterprise edition offers a shared database and vaults, two-factor authentication, and role-based access control. You’ll get all the other features with the free version as well.
Key takeaways
mRemoteNG is a tool to manage remote connections with other computer systems. It's a great ally to SysAdmins since it supports several types of connections, such as RDP, VNC, and SSH.
The benefit of using this type of tool is that the process of connecting remotely to a system becomes something like doing so to a Bluetooth headphone. Once your devices are paired, with just a click you'll be able to troubleshoot systems, store files, programs, or applications in a central location, and so much more!
Frequently Asked Questions
Is mRemoteNG safe?
Yes. The tool is trusted by SysAdmins and IT professionals all over the world.
How to see the password in mRemoteNG?
To see the password, you need to create a tool. Go to "Tools" and select "External tools." In the given fields, add the following info:
- Display name (any name you want to give this tool, for example, “retrieve password.”)
- Filename (CMD)
- Arguments (/k echo %password%)
Once you’ve added the tool, go to the list of connections and right-click on the connection you want to know the password for. Click on external tools, and then on the device's name (retrieve the password). This will launch the command prompt, displaying the password.
Is mRemoteNG free for commercial use?
mRemoteNG is a free and open source solution for all services.
