


For most working professionals, improving productivity means decluttering their diskspace or downloading a slew of Chrome extensions. However, for those who work in the IT field, productivity is synonymous with maximizing every tool available to perfectly juggle between tasks. Since most IT professionals prefer Windows OS, we’re about to explore some handy Windows productivity tips to help you reduce distractions and optimize your workflow.
Microsoft Windows offers users several built-in features, utilities, and native apps. These configurations can help you squeeze out maximum productivity in a limited time. Want to discover the best of them? Go through these seven productivity tips!
7 Windows productivity tips to put in practice in 2023
Microsoft Windows has various built-in features that can supercharge your productivity. However, even longtime Windows users are not aware of them.
Below, we’ve listed seven hacks to help you maximize your efficiency.
1. Maximize your screen space with Snap Layout
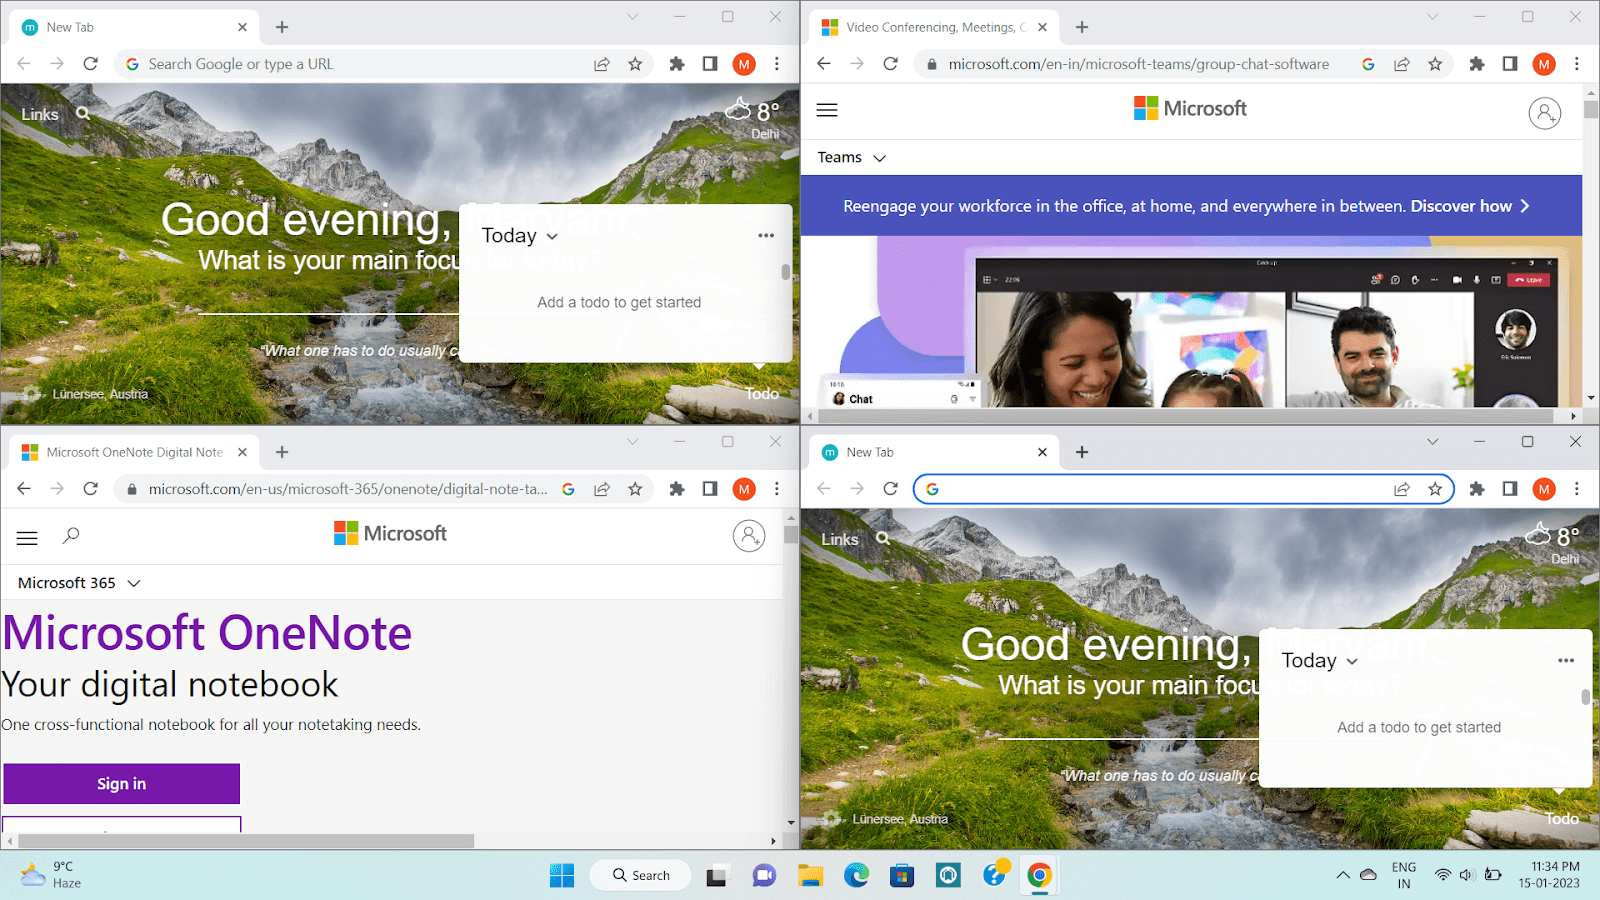
You'll love this windows productivity tip if you frequently switch between tabs while working. The Snap Layout feature has been around since Windows 7, but Microsoft has added new capabilities to this feature. It lets users view multiple open windows simultaneously.
Follow these steps to make the most of your screen space:
- In Windows 11, hover the mouse on the maximize button of a window. You'll see four layout options if you have a small screen and six layout options if you have a big screen.
- Now, select the corner where you want to view that particular window.
- You can also use the older method, which includes dragging the window to the corner where you want to view it.
The keyboard shortcut for using the Snap Layout feature is:
- Select the Windows key, then select the Left, Right, Up, or Down arrow depending on where you want to view it on the display.
- There is another keyboard shortcut for viewing the layout options. Select the Windows key + Z key.
People in the IT field are multitaskers and know how annoying it is to switch back and forth between different tabs. However, Snap Layout will help you multitask and arrange the display the way you like it. For example, you can snap two windows side-by-side and make notes on Microsoft OneNote while attending a meeting.
2. Use Focus Assist to reduce distractions
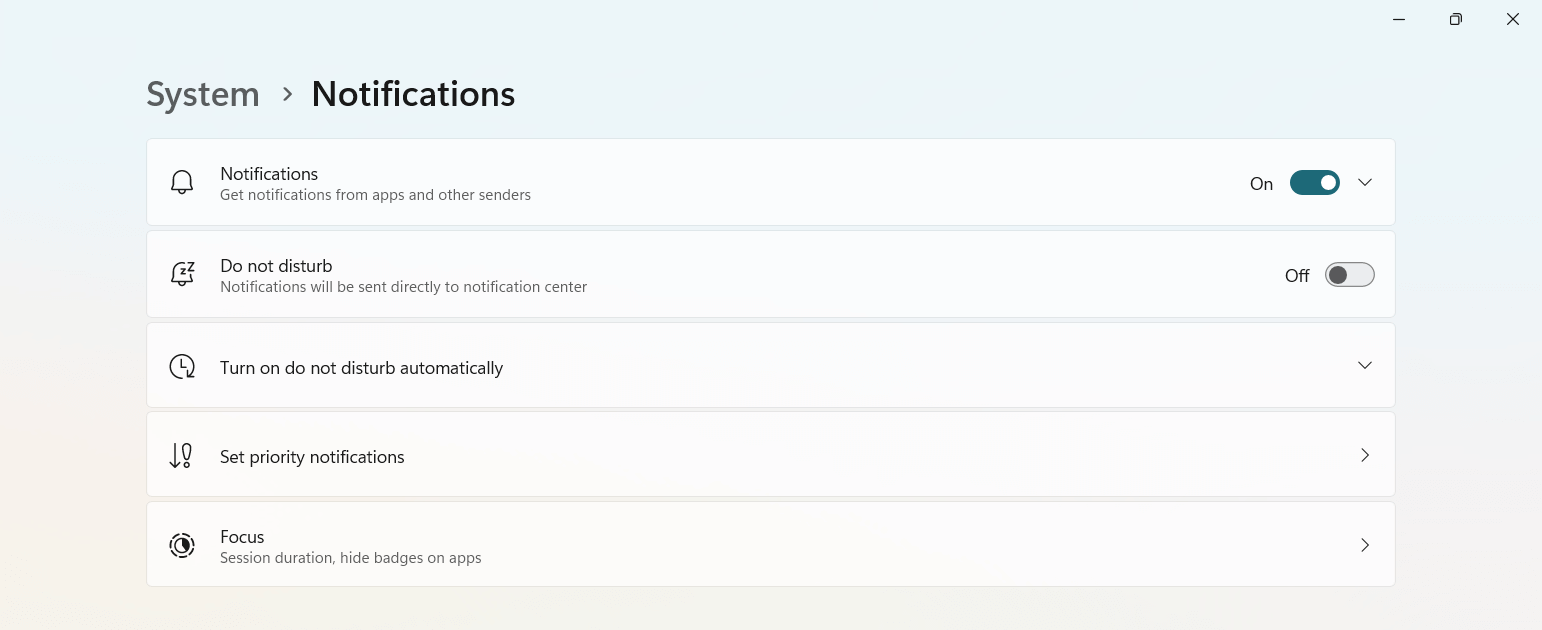
Do constant email notifications break your workflow? If your answer is yes, you'll love Focus Assist.
Focus Assist is a Windows in-built feature that blocks notifications such as email, social media, and other unimportant apps.
To use it, follow the steps listed below:
- Go to the Start Menu and select the Settings icon.
- A tab will open where you need to select System >> Notifications.
- Now turn on Do Not Disturb. It will quieten or hide any notifications.
- There is also another option called Turn on do not disturb automatically to choose specific times when you want to block notifications.
Keeping interruptions at bay is critical to staying focused at work. Further, if you're in a meeting or projecting a presentation to a screen, the last thing you want is a WhatsApp notification of your personal messages. Focus Assist can be a handy tool to avoid embarrassing moments in such situations.
3. Stay organized with Microsoft OneNote
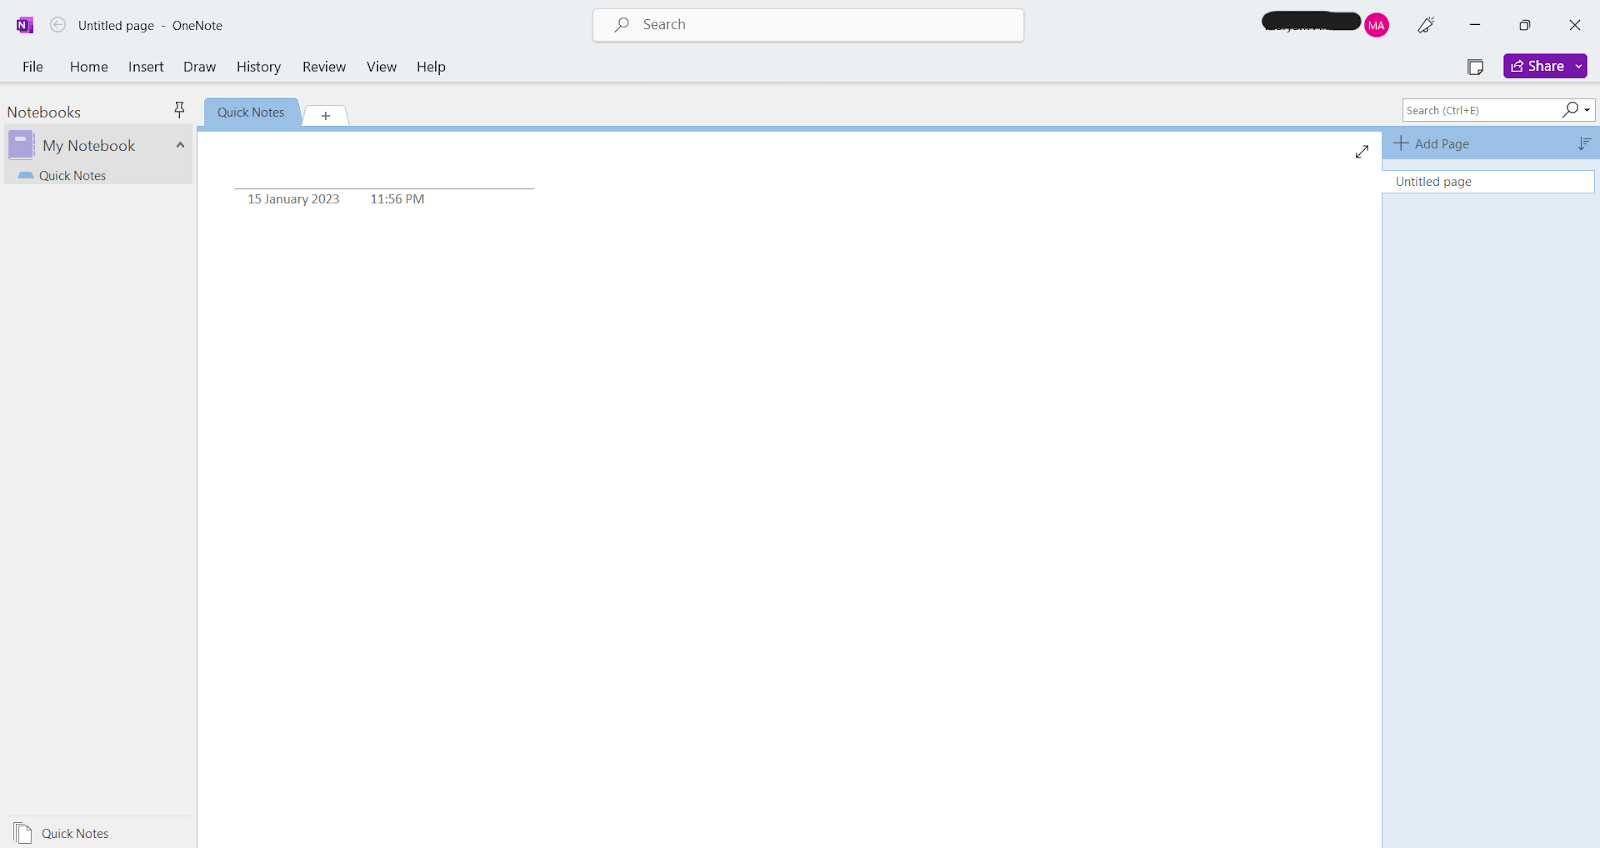
Microsoft OneNote is an excellent note-taking app that'll help you organize everything — from to-do lists to meeting notes. Instead of having critical data scattered across different apps (or worse, not documented) you can use OneNote to become more efficient at work.
For example, IT professionals can use OneNote to create notebooks and save code snippets, essential resources, meeting notes, and more.
To start using the One Note app:
- Select the search icon and type “One Note.”
- You'll see the One Note app. Select it to open the app.
- Sign in with your Microsoft email address and password.
The app can organize your content across notebooks, pages, and sections. Also, you can draw, annotate notes, add tags, record audio, and insert videos and files. You can even share the notes with coworkers which mean simpler collaboration.
4. Use ShareX to grab screenshots
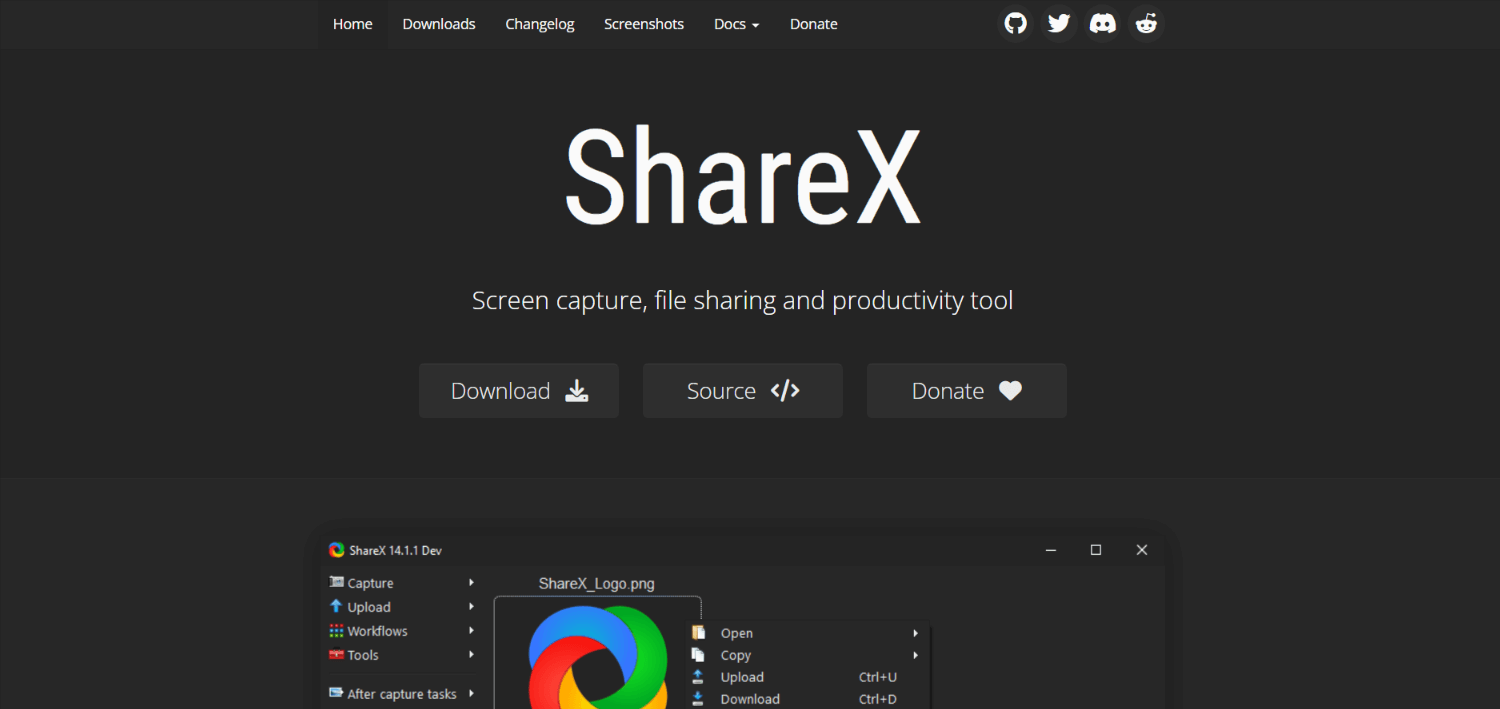
Remote and hybrid work environments have led to a rise in asynchronous communication. IT teams are increasingly utilizing tools such as screen recordings and screenshots to dodge unnecessary meeting and email bullets.
Microsoft's ShareX is one such tool. It is an open-source program that lets users quickly and easily capture, share, and organize screenshots and screen recordings.
To take a screenshot with ShareX, follow the steps listed below:
- Download ShareX from the official website.
- Once you have downloaded and installed the program, open the dashboard.
- On the left-hand side, you'll see the core buttons and menus.
- Select 'Capture', and choose among various options such as FullScreen, Window, Monitor, Region, etc.
- Then, easily access the screenshot or recording in the screenshots folder.
ShareX is a great ally to enhance productivity and efficiency. For example, you can use it to take screenshots to create knowledge base articles, or even share images and videos of software demonstrations or tutorials with team members.
5. Work on multiple tasks with Virtual Desktops
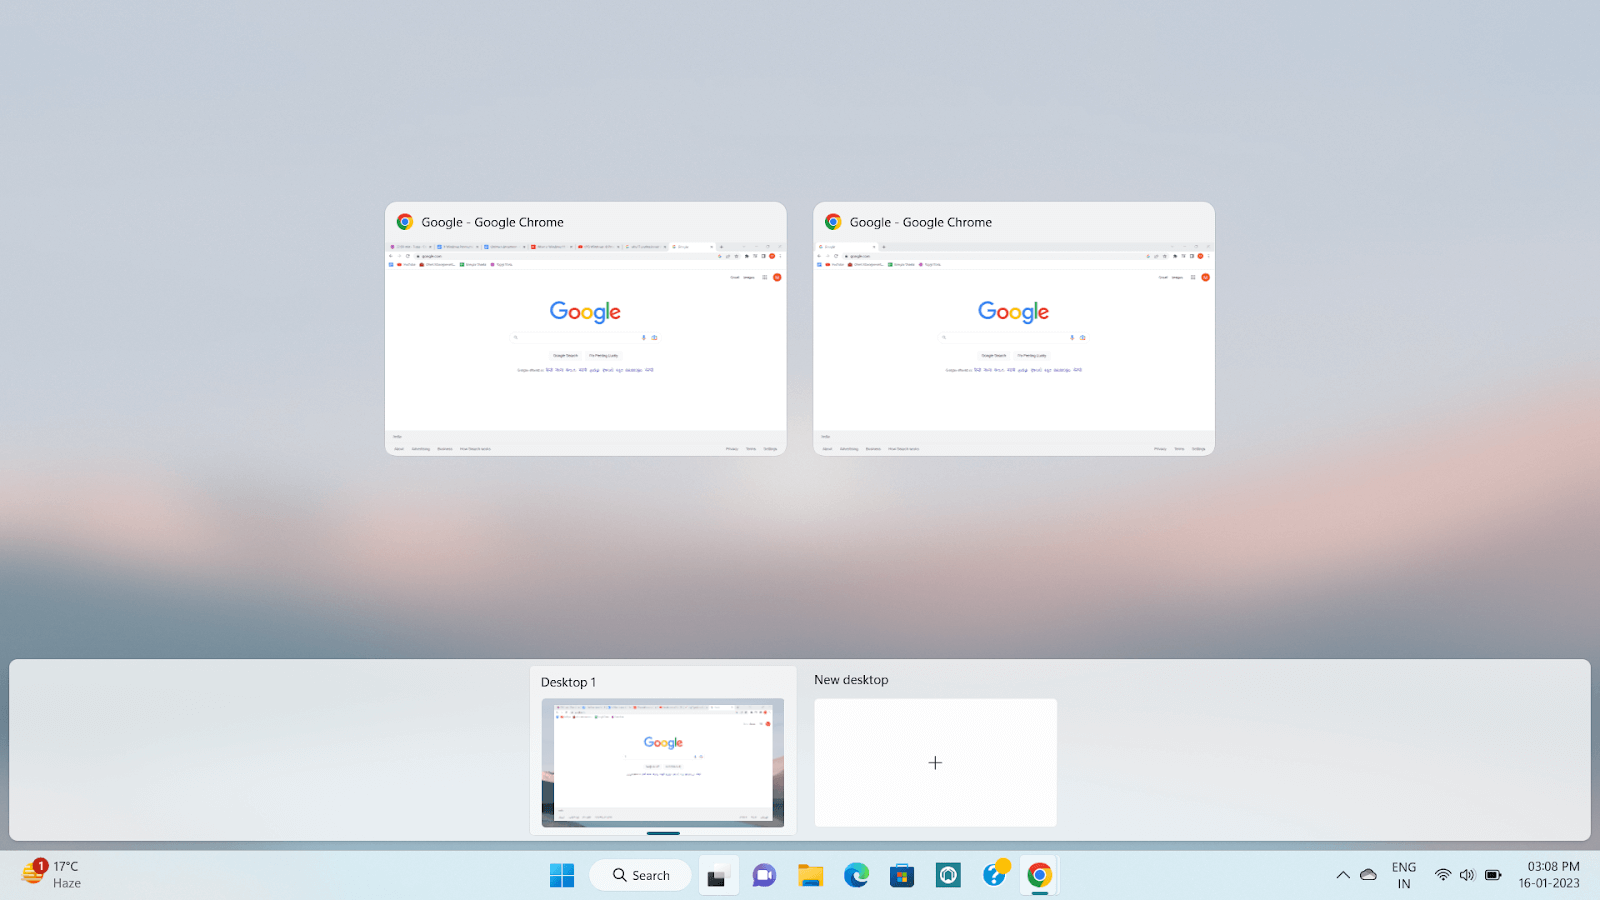
IT professionals often juggle between different projects and programs. If you're working from a single monitor, you'll find yourself switching between other windows. This process is time-consuming and slows down your productivity. In such situations, the virtual desktop feature of Windows can be a lifesaver.
This feature imitates multiple desktops so users can seamlessly work on different tasks. To use it, follow these steps:
- Go to the Task View button, which looks like two black and white overlapping rectangles. You can also press Windows Key + Tab.
- Now, you'll see the option to add a new desktop. Select the + icon to add a new virtual desktop.
- The keyboard shortcut for adding a new desktop is Windows Key + Control + D.
Microsoft regularly improves and adds new features to its operating System. The virtual desktop feature enables users to use more than one application simultaneously. For example, you can create Desktop 1 using Microsoft Office and Microsoft Word. Then, you can create a second desktop for attending meetings through Microsoft Team.
6. Research instantly with Smart Lookup
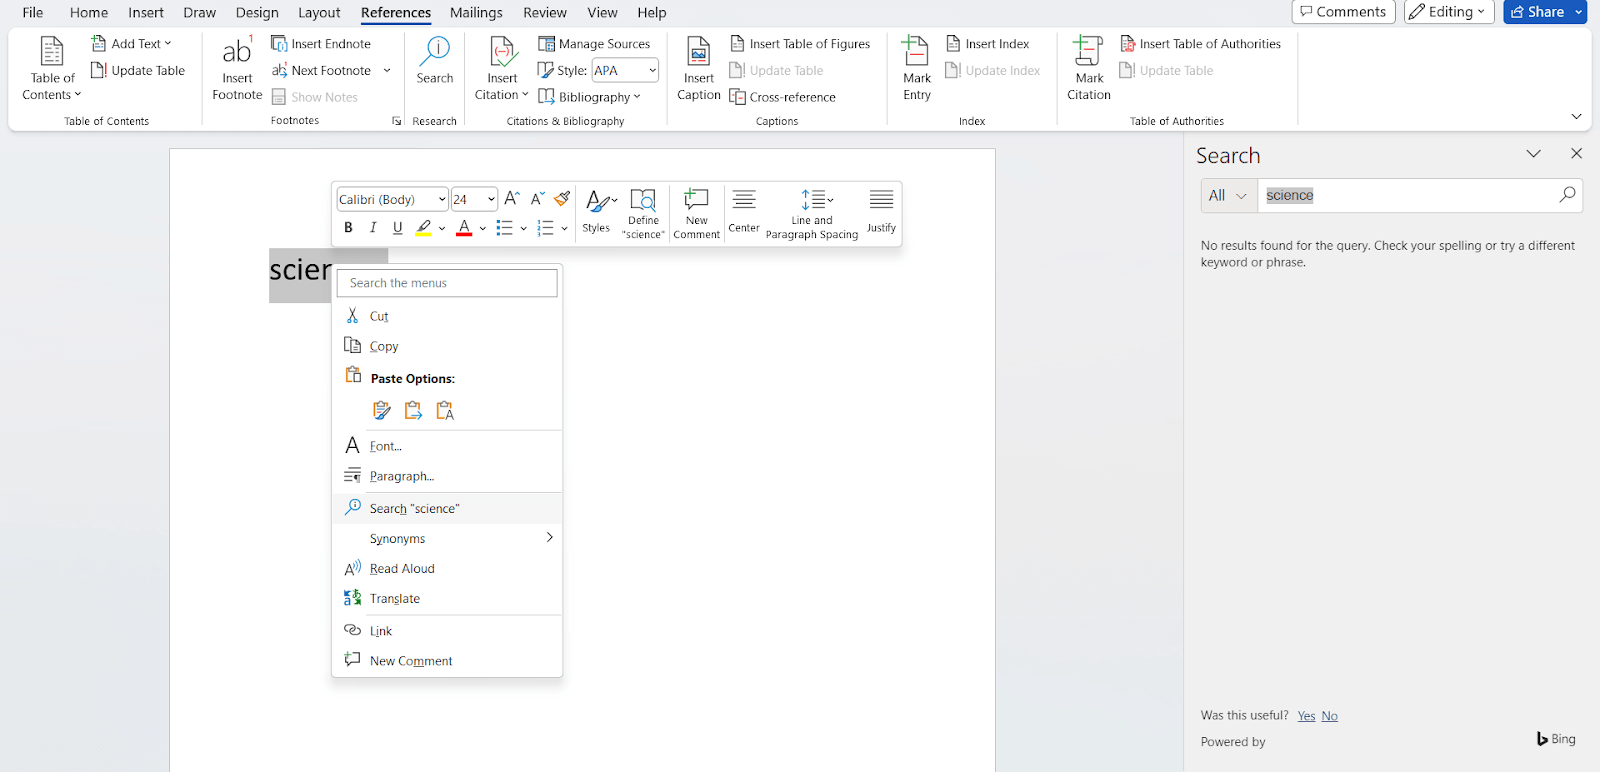
Were you ever working on a document in Microsoft Word and wanted to do more research about the topic? You likely switched to an Internet browser to learn more about it. What if we told you that you no longer need to leave the document?
Smart Lookup is an excellent feature available in Microsoft Office products. It helps you conduct research using Microsoft’s Bing search engine. This eliminates the need to switch between two different applications. Remember that to use this feature, you'll need an Internet connection.
To use this feature, follow these steps:
- Open Microsoft Word and select the word or phrase you want to research. Now, select Smart Lookup from the References tab. A panel will appear on the right, with search results for that word.
- There is another method for using this feature. Select the word or phrase and right-click. Choose Smart Lookup from the available options. An insights panel will appear on the right side with search results from the web.
7. Organize emails in folders
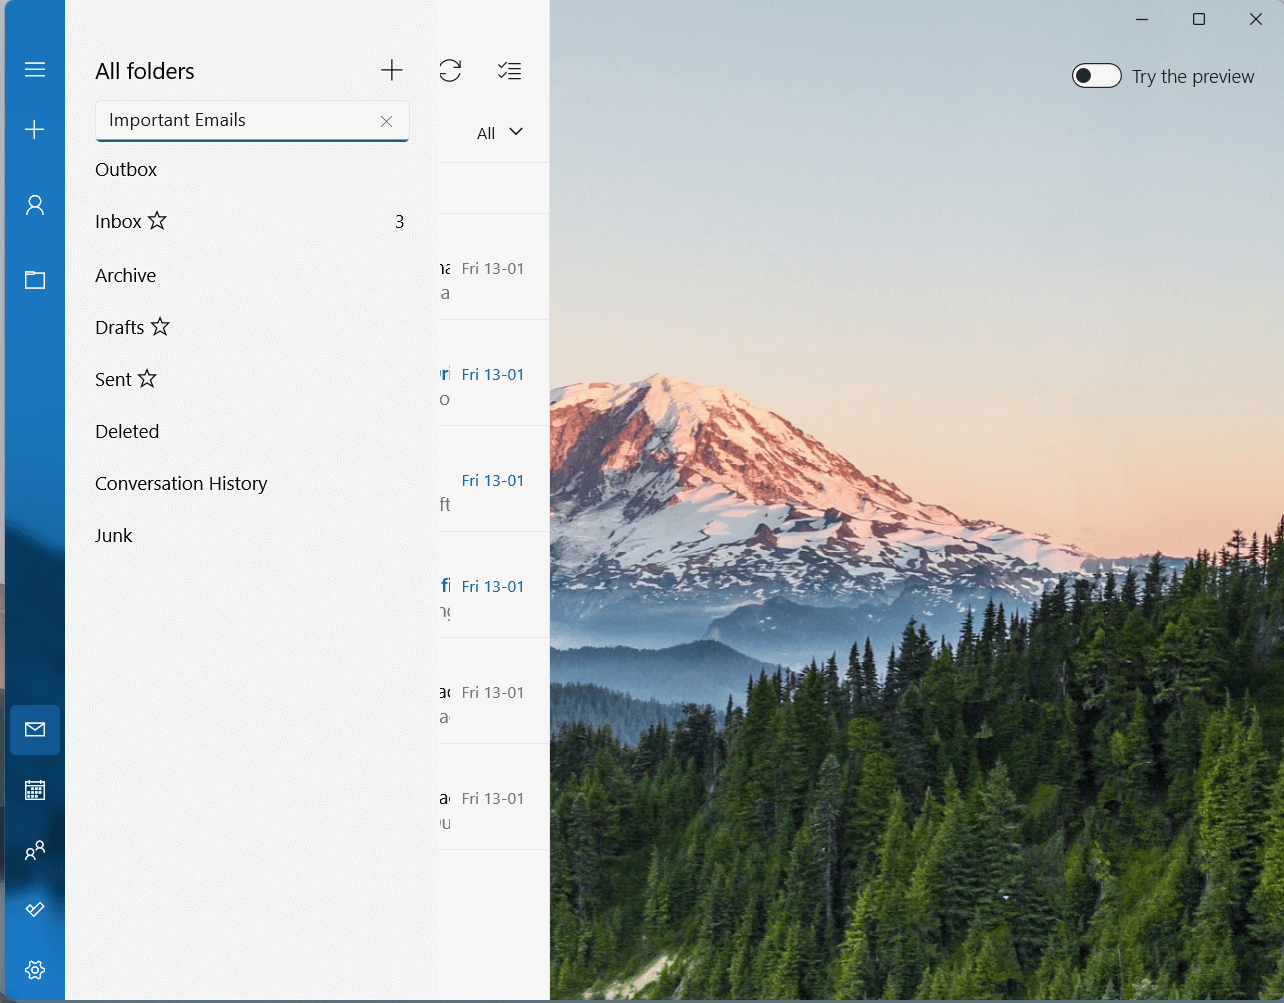
Did you know that 28% of an IT professional’s time is spent managing email? For that reason, though it's a bit obvious, we're tackling it as our last Windows productivity tip.
In Microsoft Outlook, you can create folders to organize emails, and categorize incoming requests by prioritizing messages that are most important to your work.
To create folders, follow these steps:
- Open your Microsoft Outlook account.
- Click the hamburger icon on the left side.
- Select Folders. Now, click the + icon to create a new one.
- Give a name to the folder and press Enter.
- To move an email to the new folder, open your inbox. Select the appropriate email and click the three dots on the right-hand side. Select Move and choose the folder where you want to add the email.
Now, you have successfully created a folder to manage your inbox. Whenever a new email arrives, move it to the appropriate folder. This way, you'll achieve zero inboxes, and important emails won't be pushed down whenever new emails come.
Key takeaways
Integrating your daily workflow with these Windows productivity tips will supercharge your productivity.
They will enable you to:
- Make the most of your screen space.
- Minimize interruptions.
- Create and organize your notes.
- Communicate asynchronously.
- Easily multitask.
- Manage your emails and achieve inbox zero.
Of course, this is just a complement to make the most of a tool, but by itself, it doesn’t have the power to truly transform your way of working. That can only be achieved with specific platforms that allow you a deeper level of automation. And we know a thing or two about that!
If you need a hand making your IT support more efficient, this  of
of  might be exactly what you need!

