IT asset relocation is the process of moving technology resources from one place or person to another, with zero gaps in custody, security, or records.
Why does this matter? Because every move introduces risk. Without a clear process, devices can go missing, records get outdated, and compliance slips through the cracks.
In this post, we’ll explain what IT asset relocation means in practice, how it fits within IT Asset Management, the most common pitfalls to avoid, and how to build a reliable relocation process that keeps your assets accounted for, secure, and ready to use.
What is IT asset relocation?
IT asset relocation is the structured process of transferring IT resources from one place or person to another while maintaining full control over custody, security, and records. The objective is simple: ensure the asset reaches its new destination in working condition and that the system of record is updated accordingly.
In most cases, relocation means moving physical devices like laptops, monitors, or servers. But it can also cover non-physical moves such as reassigning ownership or cost centers, reallocating software licenses, or shifting servers and networking gear between racks or sites.
When do businesses need to relocate assets?
Organizations face many situations where assets need to be moved. For physical devices, the most common scenarios include:
- Office moves or reorganizations – shifting equipment between floors, rooms, or entire buildings.
- Employee transfers – relocating laptops, peripherals, or phones when staff change departments or locations.
- Onboarding and offboarding – shipping kits to new hires, or collecting devices from departing employees.
- Hybrid and remote work setups – sending equipment to home offices and retrieving it when no longer needed.
- Data center changes – moving servers, networking gear, or storage units between racks or facilities.
- Mergers, acquisitions, or consolidations – redistributing assets when organizations combine or restructure.
- Site openings or closures – equipping new offices or clearing out old ones.
- Lease returns and redeployment – sending leased hardware back or reassigning it elsewhere.
- Project-based moves – reallocating specialized devices to where they’re temporarily required.
A note on digital assets: not all relocations are physical. Organizations also “move” assets by reassigning ownership or cost centers, transferring software licenses, or shifting workloads in data centers or the cloud. These don’t involve shipping hardware, but they still require updates in your system to maintain accuracy and compliance.
Benefits of properly tracking IT asset relocation
Relocating assets is unavoidable, but how you track it makes all the difference. A well-documented relocation process ensures that every move strengthens your IT Asset Management practice instead of weakening it.
Here are three key benefits of properly tracking IT asset relocation:
- Stronger security and compliance - Every asset carries data and access risks. Tracking relocations ensures devices don’t get lost in transit, reduces the chance of unauthorized use, and keeps your organization aligned with audit and regulatory requirements.
- Accurate inventory and reporting - Moves are a common source of “ghost assets” in ITAM. Recording each relocation keeps your CMDB or asset inventory up to date, so teams can trust the data they use for support, procurement, and planning.
- Reduced costs and downtime - Properly tracked relocations mean equipment arrives on time, in the right place, and ready to work. That cuts hidden costs from lost devices, unnecessary replacements, and delays for employees waiting on their tools.
How to get started with an asset move: the IT asset relocation process
Every relocation follows the same foundation: plan it, document it, move it, confirm it, and update your records.
The core flow doesn’t change, but the level of detail depends on the context. Moving a single laptop to a new employee is not the same as migrating a data center or reallocating licenses in bulk.
#1. Plan and authorize
The process begins with a clear plan. Define what assets are being moved, who is responsible, and when it will happen.
For large-scale relocations, this may include a project plan with timelines, downtime windows, and designated roles. For one-off moves, a simple approval in your IT Asset Management system may be enough.
#2. Document and prepare
Before anything is moved, record the asset’s details and update or apply identification tags. For individual relocations, this step ensures nothing is lost during transfer.
For bulk moves, it also means backing up data, mapping configurations, and labeling equipment so it can be quickly reinstalled at the new location.
#3. Pack and transfer
The actual move varies depending on the type of relocation. A single device might be shipped to an employee’s home with a custody log, while servers or networking gear may require professional movers and secure packing.
For digital relocations, this step means transferring ownership, reassigning licenses, or updating cost centers in your system.
#4. Receive and reinstall
Once the assets arrive, they need to be checked and set up. At a minimum, this means confirming delivery and running a functionality test.
Larger relocations may involve reinstalling entire infrastructures, reassembling racks, and validating dependencies before operations resume. For digital relocations, this step is about verifying that new assignments or entitlements are active and working as intended.
#5. Update records and close
The relocation is not complete until the system of record reflects the new reality. This step ensures that your IT Asset Management platform or Configuration Management Database (CMDB) is fully updated, with no mismatches between what was moved and what’s recorded.
In bulk moves, it often includes a post-move audit to catch missing or misconfigured assets before closing the relocation project.
Asset relocation checklist
An asset relocation checklist is a structured set of tasks that guides organizations through the process of moving IT assets. Its purpose is to ensure no step is missed, from planning and labeling to transport, installation, and record updates.
Step 1: Pre-move preparation
- Define the scope of the relocation (individual, bulk, or digital).
- Assign a relocation owner or project manager.
- Approve the relocation request in your IT Asset Management system.
- Create or update the asset inventory with serial numbers, ownership, and current location.
- Apply or confirm asset tags (QR codes, barcodes, or smart tags).
- Back up all critical data from devices being moved.
- Encrypt sensitive data or wipe drives if the asset will be decommissioned.
- Prepare packaging materials or hire specialized movers if needed.
- Communicate the relocation plan to stakeholders and end users.
Step 2: Packing and transport
- Packing and transport.
- Disconnect and label cables and peripherals.
- Pack devices securely with protective materials.
- Label each package with asset details and destination.
- Log each item into a custody record before it leaves the site.
- Arrange secure transport (courier, in-house, or professional movers).
- Track assets in transit, ideally with scanning at pickup and drop-off.
Step 3: Arrival and setup
- Arrival and setup.
- Verify all items against the custody log on arrival.
- Inspect equipment for damage.
- Reinstall and reconnect devices at the new location.
- Restore data backups and test system functionality.
- Validate access rights and security controls.
- Confirm that end users can operate normally.
Step 4: Arrival and setup
- Verify all items against the custody log on arrival.
- Inspect equipment for damage.
- Reinstall and reconnect devices at the new location.
- Restore data backups and test system functionality.
- Validate access rights and security controls.
- Confirm that end users can operate normally.
Step 5: Arrival and setup
- Update the IT Asset Management system or CMDB with the new owner, location, and status.
- Reconcile the updated inventory against the original plan.
- Report and resolve any missing, damaged, or mismatched items.
- Close the relocation project or ticket only once records and reality align.
- Document lessons learned for future relocations.
Scaling the checklist
- For individual relocations, only a subset of these tasks may apply (e.g., a laptop move won’t require movers or phased downtime planning).
- For bulk relocations, all steps become critical, with additional project management, stakeholder coordination, and audits.
- For digital relocations, the focus shifts to approvals, ownership changes, license transfers, and ITAM record updates rather than physical logistics.
How InvGate supports IT asset relocation
At InvGate, we know that moving assets is more than just shipping equipment from point A to point B — it’s about making sure the process is secure, efficient, and fully documented. That’s why we offer both Asset Management and Service Management solutions that work seamlessly together to simplify IT asset relocation.
With InvGate Asset Management, you gain full visibility and control over every device in your inventory, while InvGate Service Management ensures relocation requests are properly managed, approved, and tracked through automated workflows. The result is a streamlined experience that reduces risks, prevents lost devices, and keeps your IT records up to date.
InvGate Asset Management and IT asset relocation
InvGate Asset Management gives you complete visibility and control over your IT resources at every stage of the relocation process. Key features include:
- Comprehensive, automated inventory – Maintain a clear view of your assets before, during, and after relocation, with multiple population methods: manual entry, bulk uploads (CSV/XLS), network discovery, installed agents, and integrations with tools like Intune, Azure, or Jamf.
- End-to-end asset tracking – Monitor location, ownership, lifecycle status, costs, and depreciation to keep every detail accurate and up to date.
- Custom fields and locations – Go beyond default attributes by adding specific fields and creating as many locations as you need, with the level of detail your organization requires.
- QR codes and scanning – Generate and print QR codes for faster asset identification, record access, and on-the-spot updates during relocations.
- Smart tags – Bulk update locations, group assets by site, and monitor subsets of assets with precision.
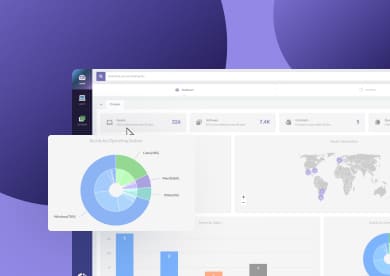
- Reports and dashboards – Automate reporting and build customized dashboards to track relocation progress and measure results in real time.
InvGate Service Management and IT asset relocation
InvGate Service Management ensures that every relocation is properly requested, approved, and tracked, making the process seamless for both IT teams and employees. Key features include:
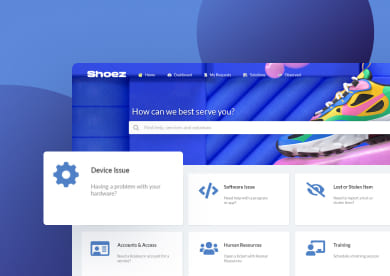
- Service Request Management – Standardize asset relocation as a catalog item so employees, managers, or IT teams can request moves in a structured way.
- Workflow automation – Automate approvals, custody handoffs, and notifications to reduce delays and human error.
- SLAs and prioritization – Apply Service Level Agreements to relocation requests to ensure timely execution, especially during office moves or large-scale projects.
- Collaboration across departments – Coordinate IT, HR, and Facilities teams through a single platform, ensuring everyone stays aligned during relocations.
- Audit trail and compliance – Keep a full record of every request and step taken, providing clear documentation for audits and security reviews.
- Integration with Asset Management – Sync relocation requests directly with InvGate Asset Management, so asset records are updated automatically once the move is completed.


